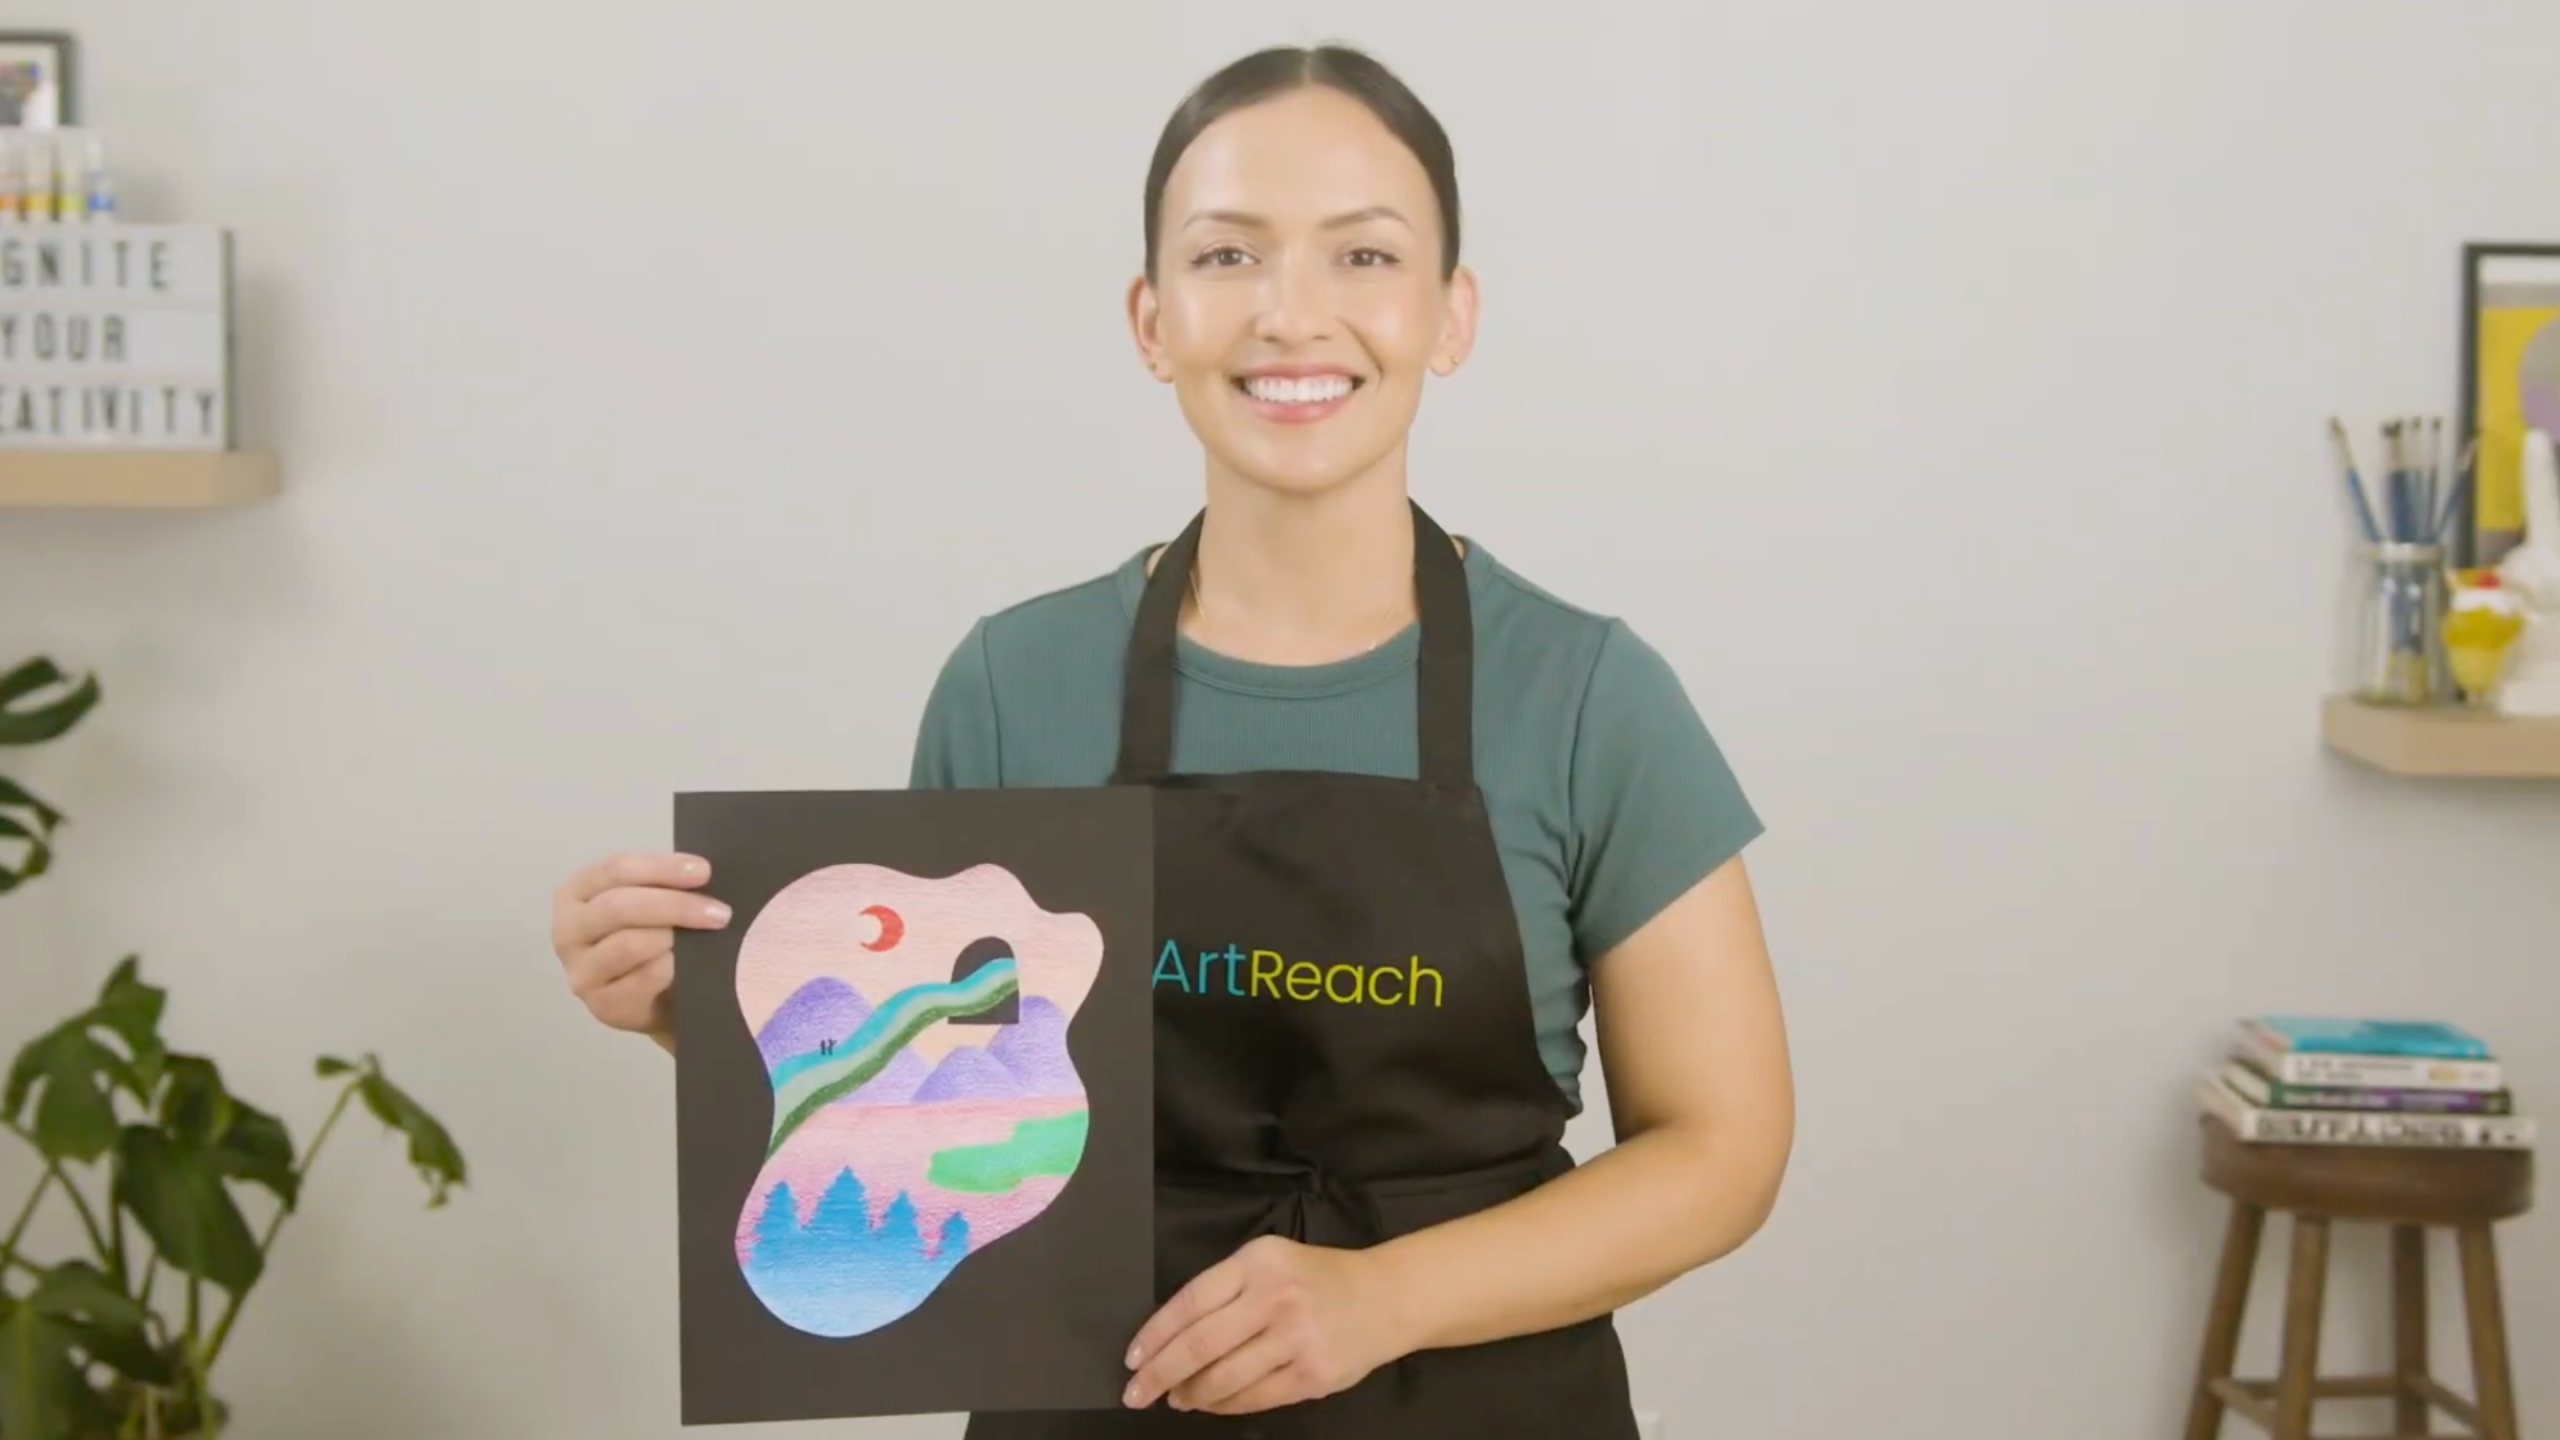
Have you ever thought about stepping into a brand-new world? What kind of changes would you experience? Creating art can help us explore these big ideas. Today, we’ll learn how to draw our own magical portals. These special drawings are like doors to other places. They let us think about new adventures and exciting changes. We will use drawing and coloring techniques to bring our unique visions to life.
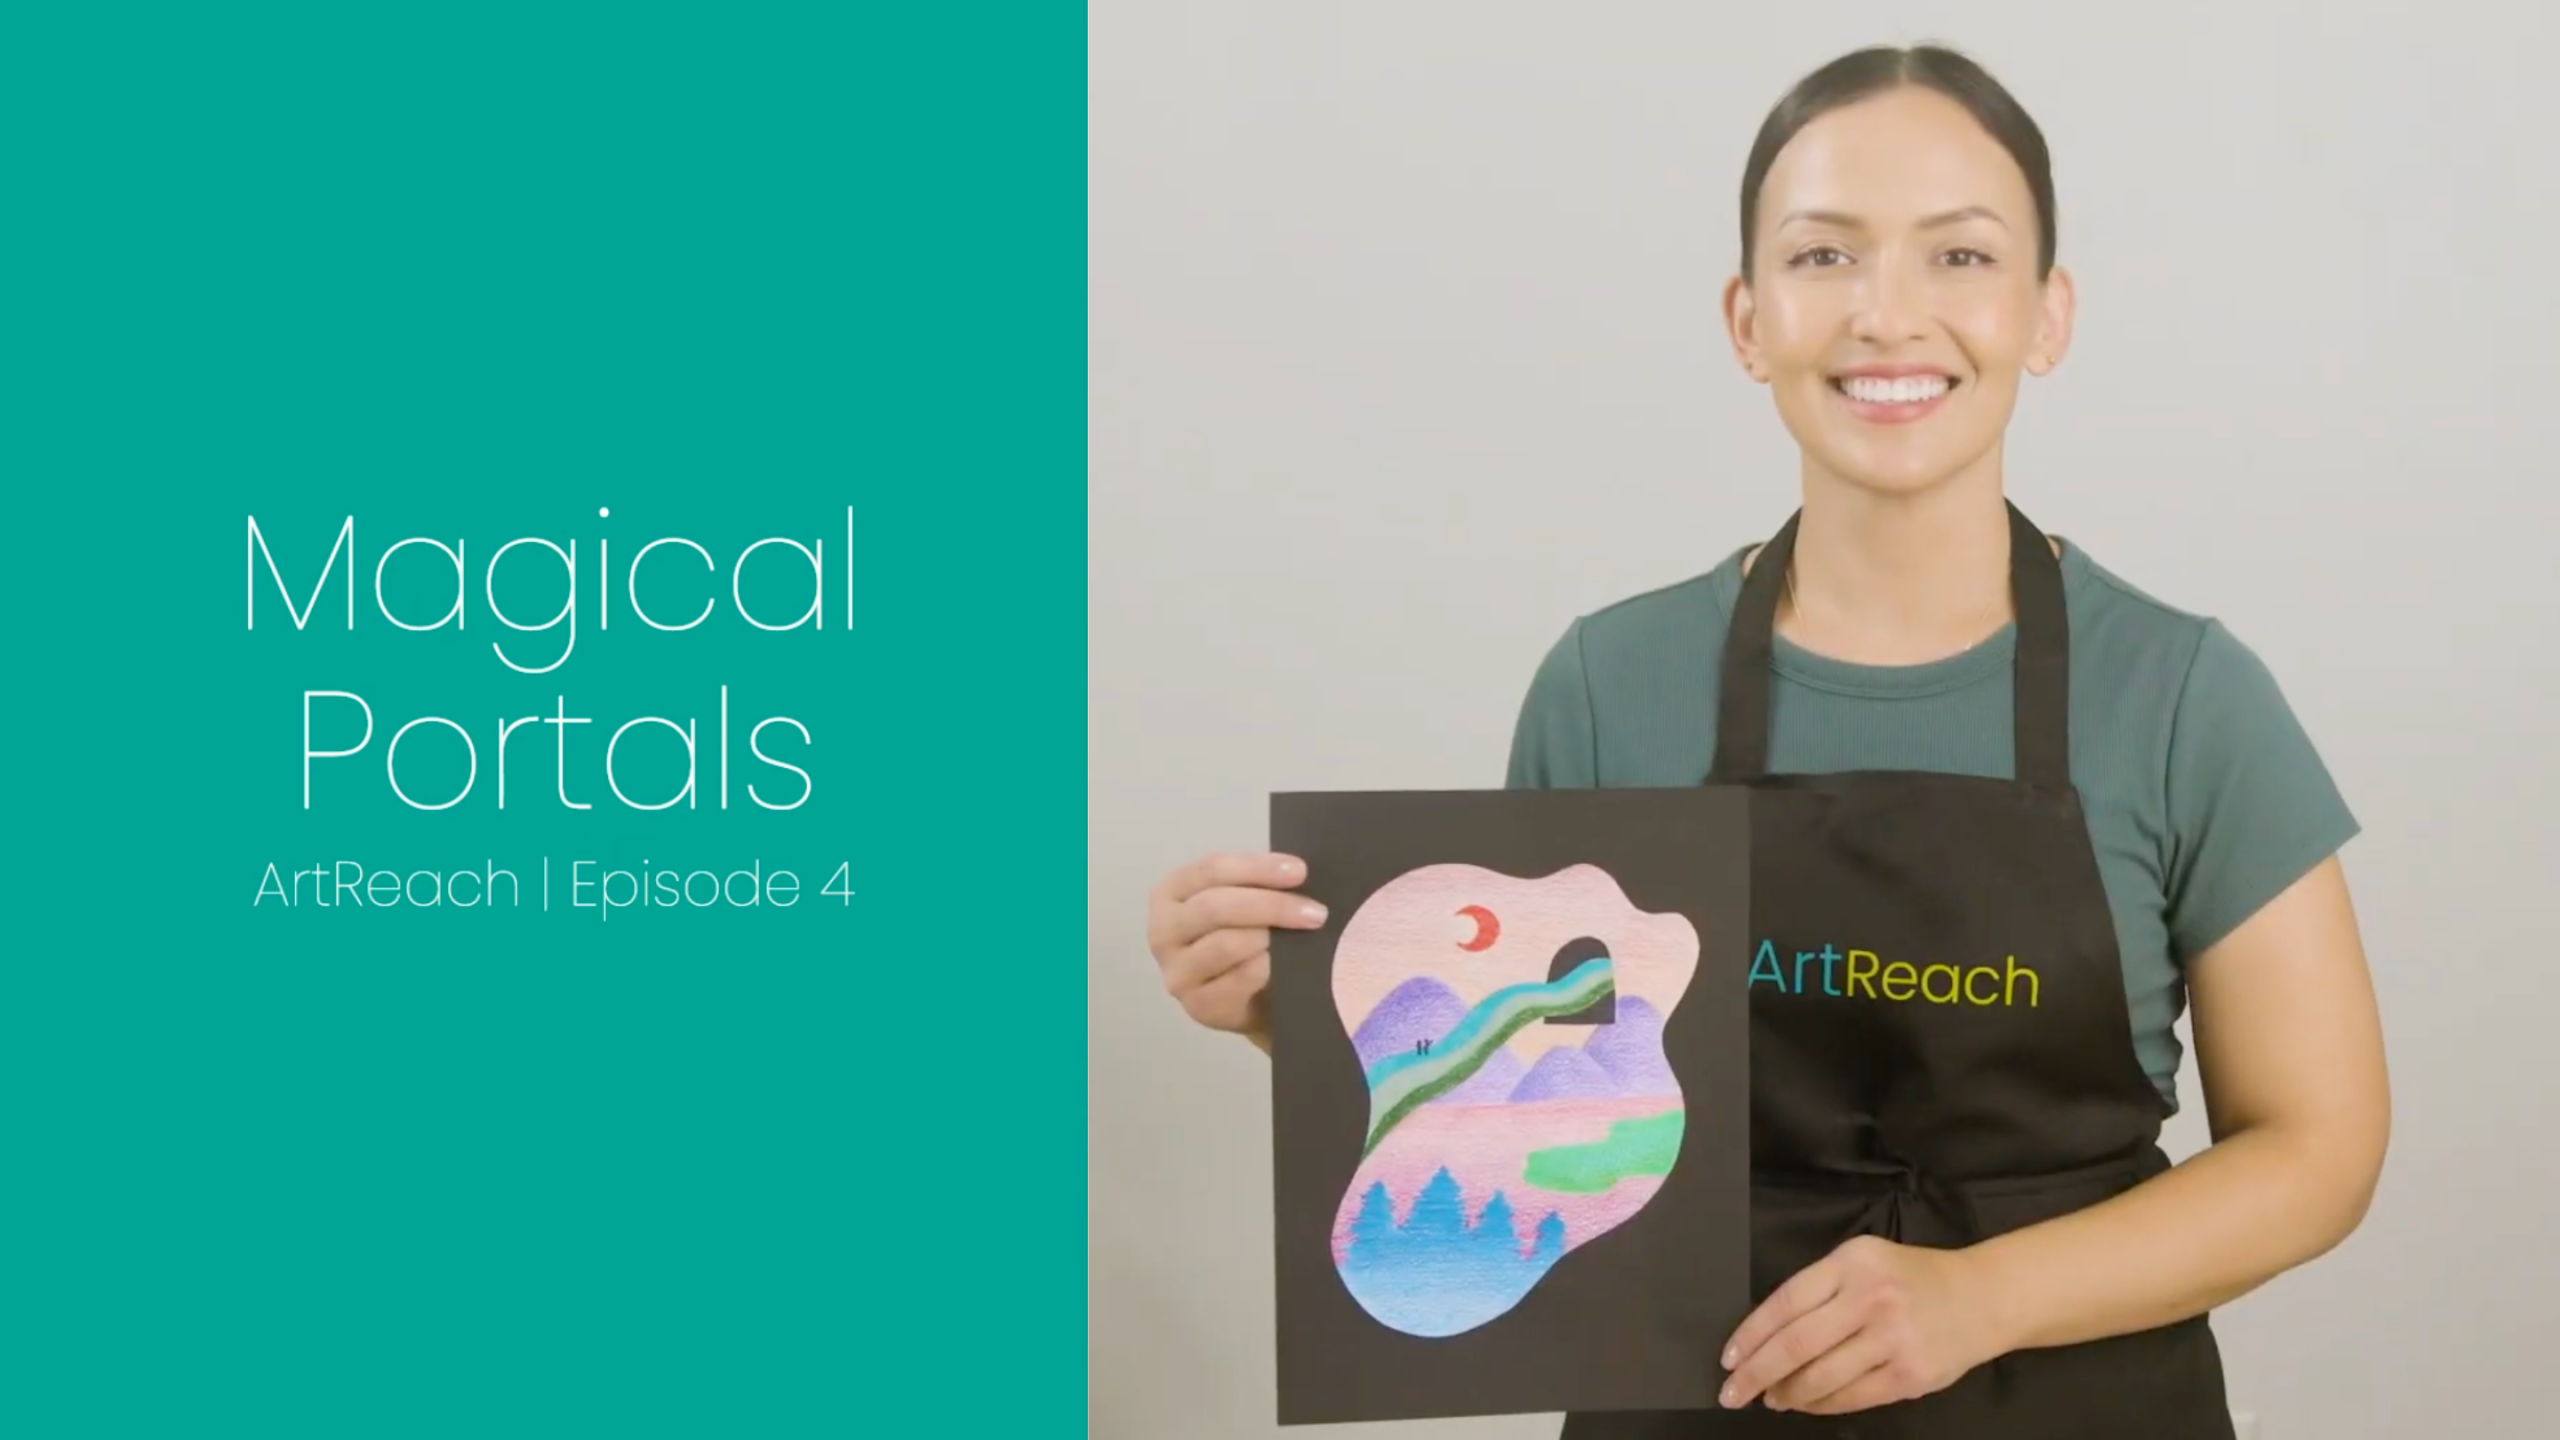
Watch this lesson on YouTube >>
Understanding Portals and Personal Change
Portals are more than just doorways. They are passageways to special places where anything can happen. They symbolize new beginnings and important changes. When you imagine walking through a portal, you think about what kind of transformation might occur. Will you discover amazing things about yourself? Will you be different somehow on the other side?
Thinking about change can bring many feelings. Trying something new or going somewhere unfamiliar can feel exciting, but also a little scary. Art helps us explore these feelings safely. When you draw yourself in front of your portal, you can imagine yourself bravely facing new situations. This helps you understand your emotions better. It shows that having many feelings at once is normal. Using art to think about change helps us grow. We become better at understanding ourselves and our emotions.
Drawing Inspiration from Talented Artists
Artists often use transformation and change as themes in their work. Looking at their creations can spark our own imaginations. Let’s explore a few artists who use portals in unique ways.
Regan Russell’s Colorful Landscapes
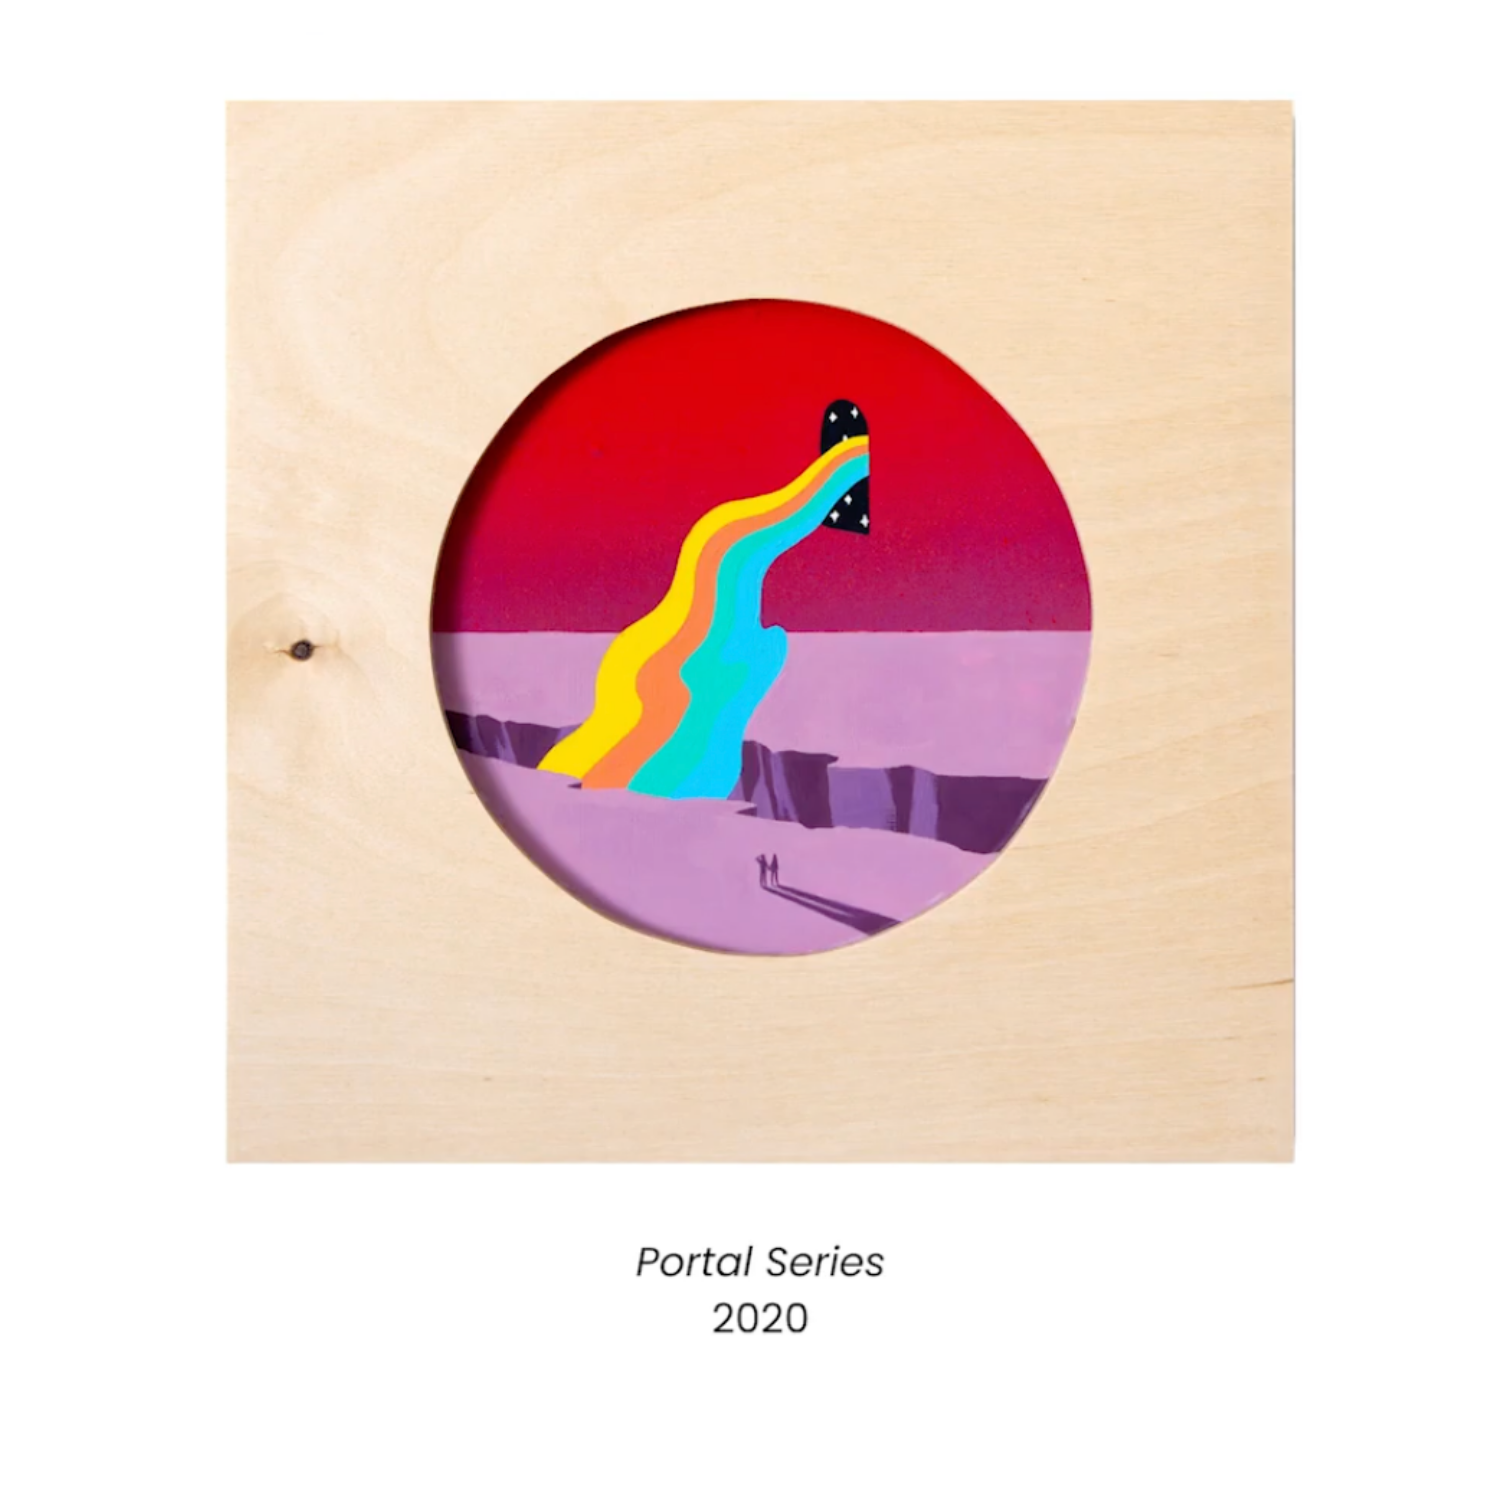
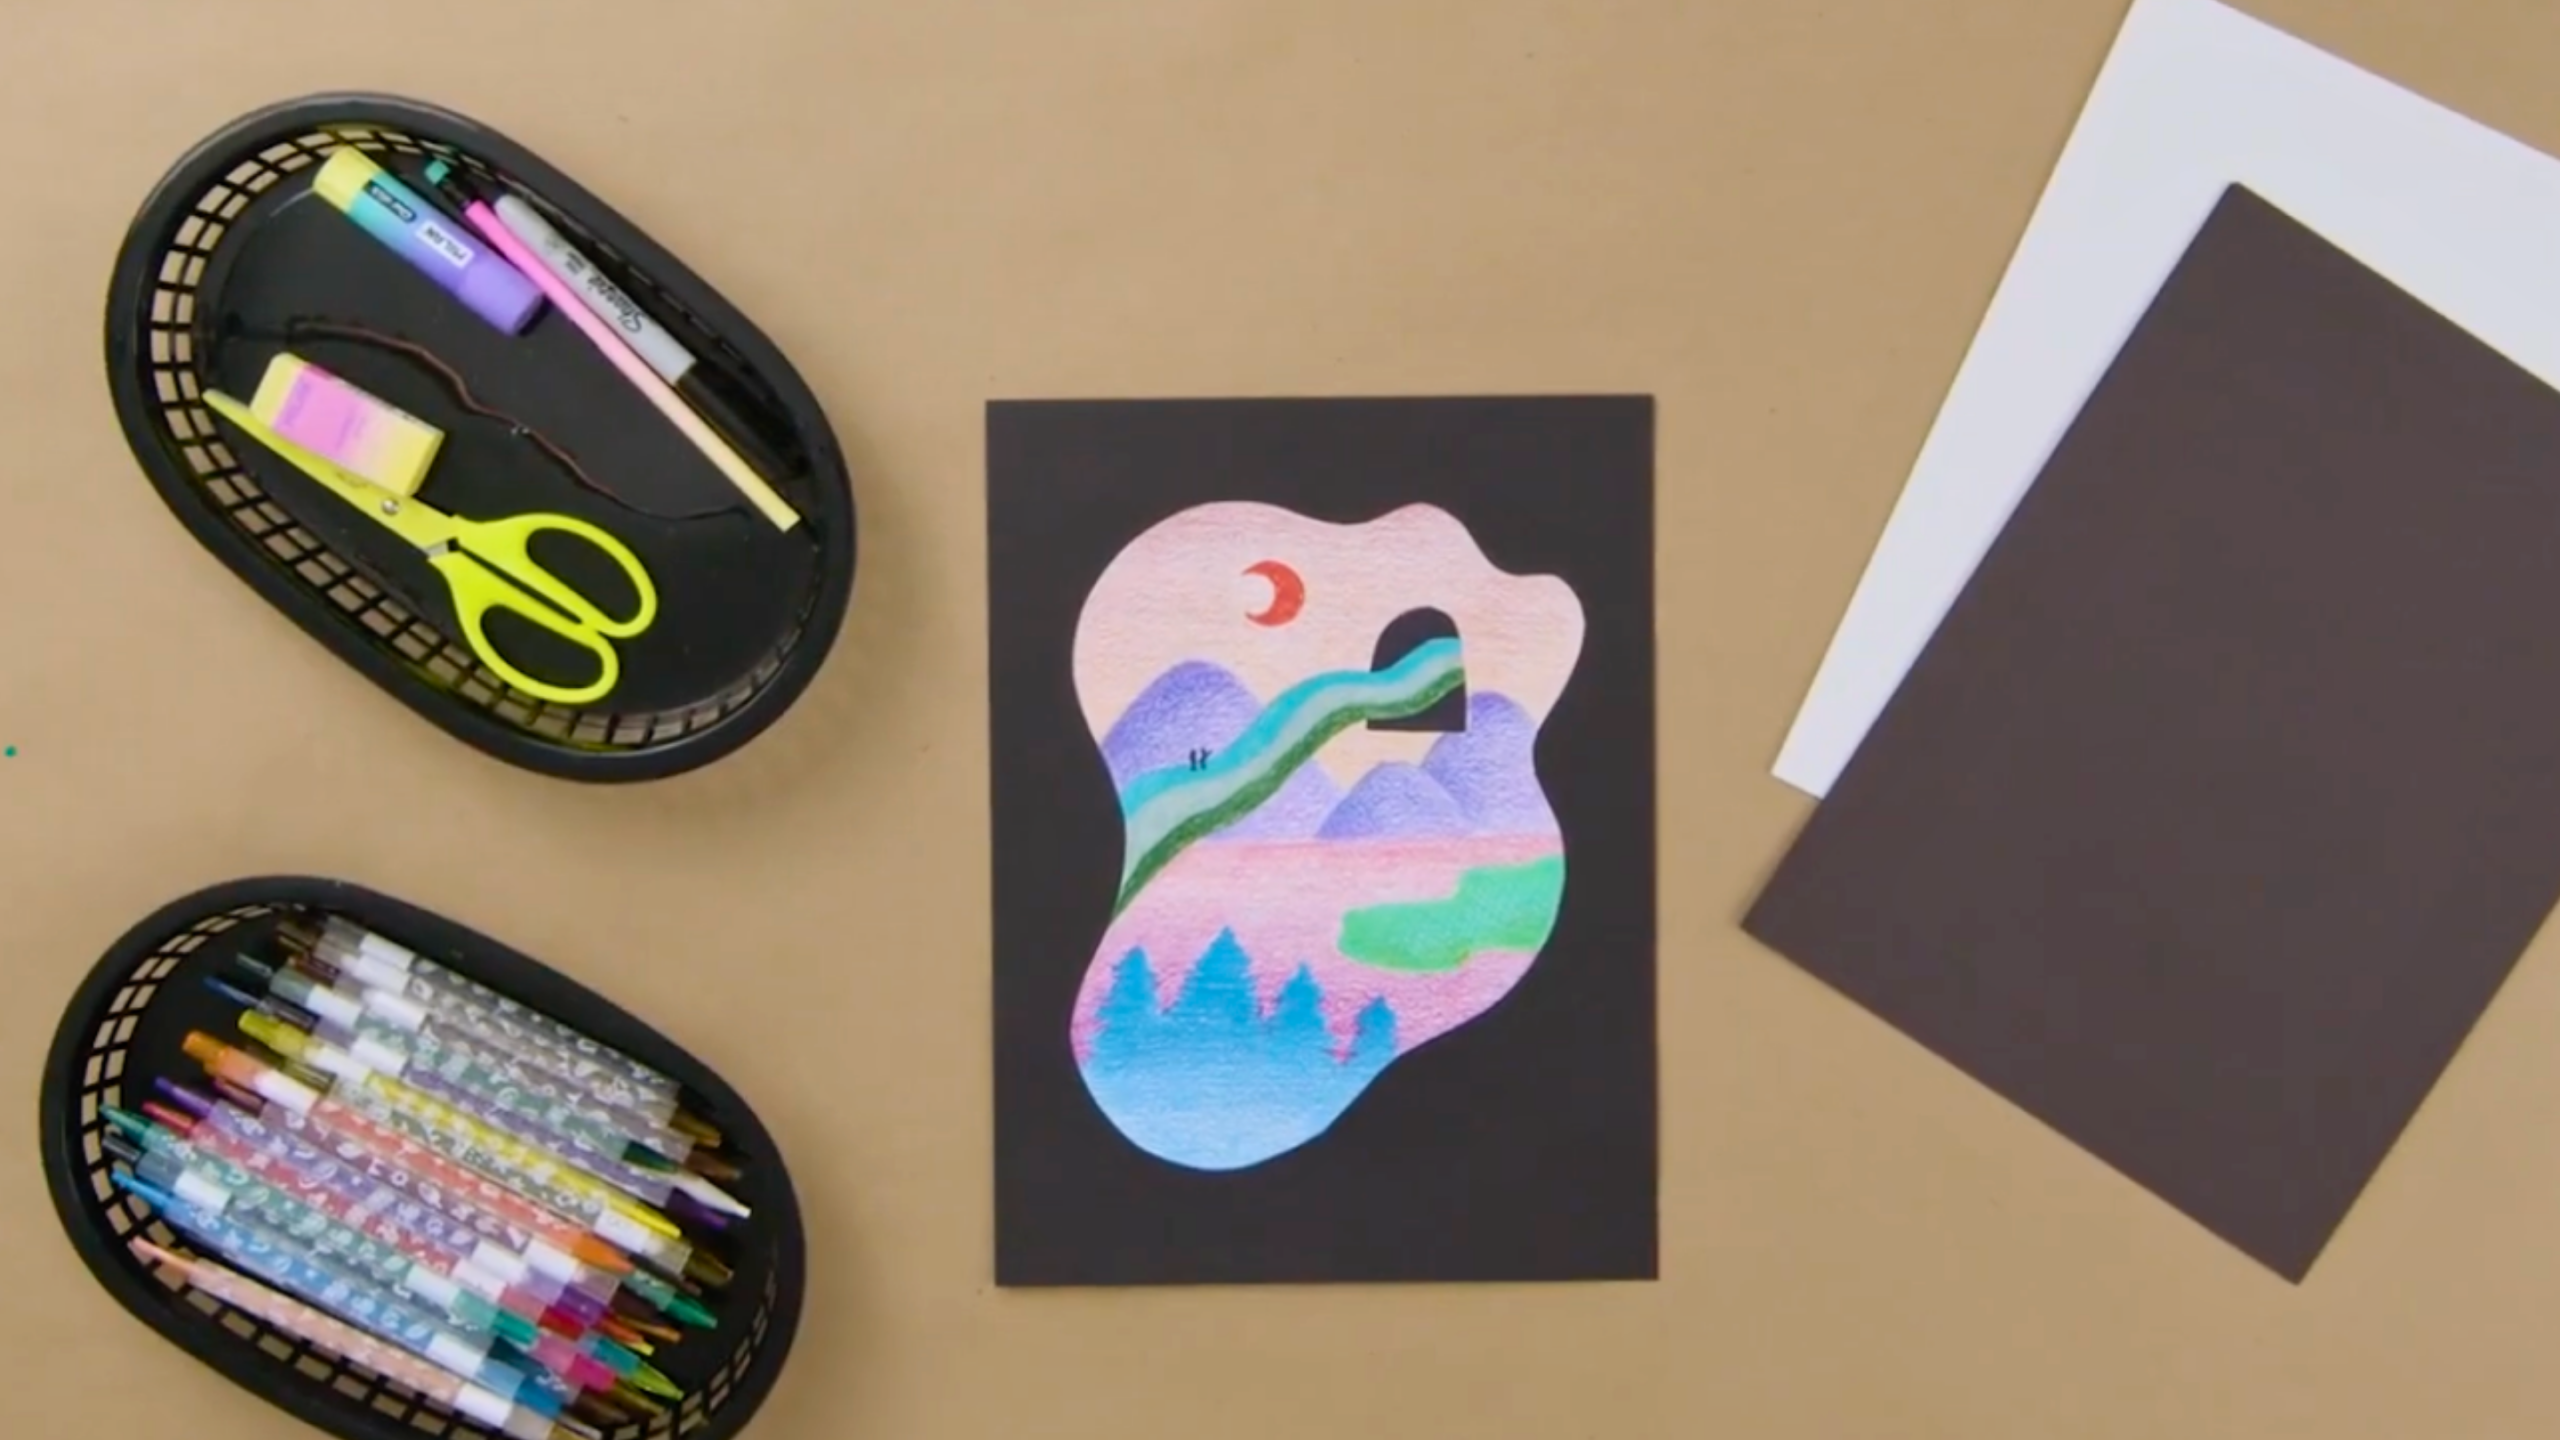
Regan Russell is an artist from San Diego. He paints very colorful scenes of the outdoors. These large pictures of nature, with mountains, skies, trees, and rivers, are called landscapes. Regan always adds portals to his paintings. He makes them black, which creates a sense of mystery. We don’t know what lies behind them. All the bright colors are in the natural scene around the portal.
Regan often uses a special coloring method called a gradient. A gradient is when you blend two colors smoothly together. This technique makes colors change slowly, like the sky changing colors during a sunset. We will practice making gradients with colored pencils in our own art.
Victo Ngai’s Detailed Adventures
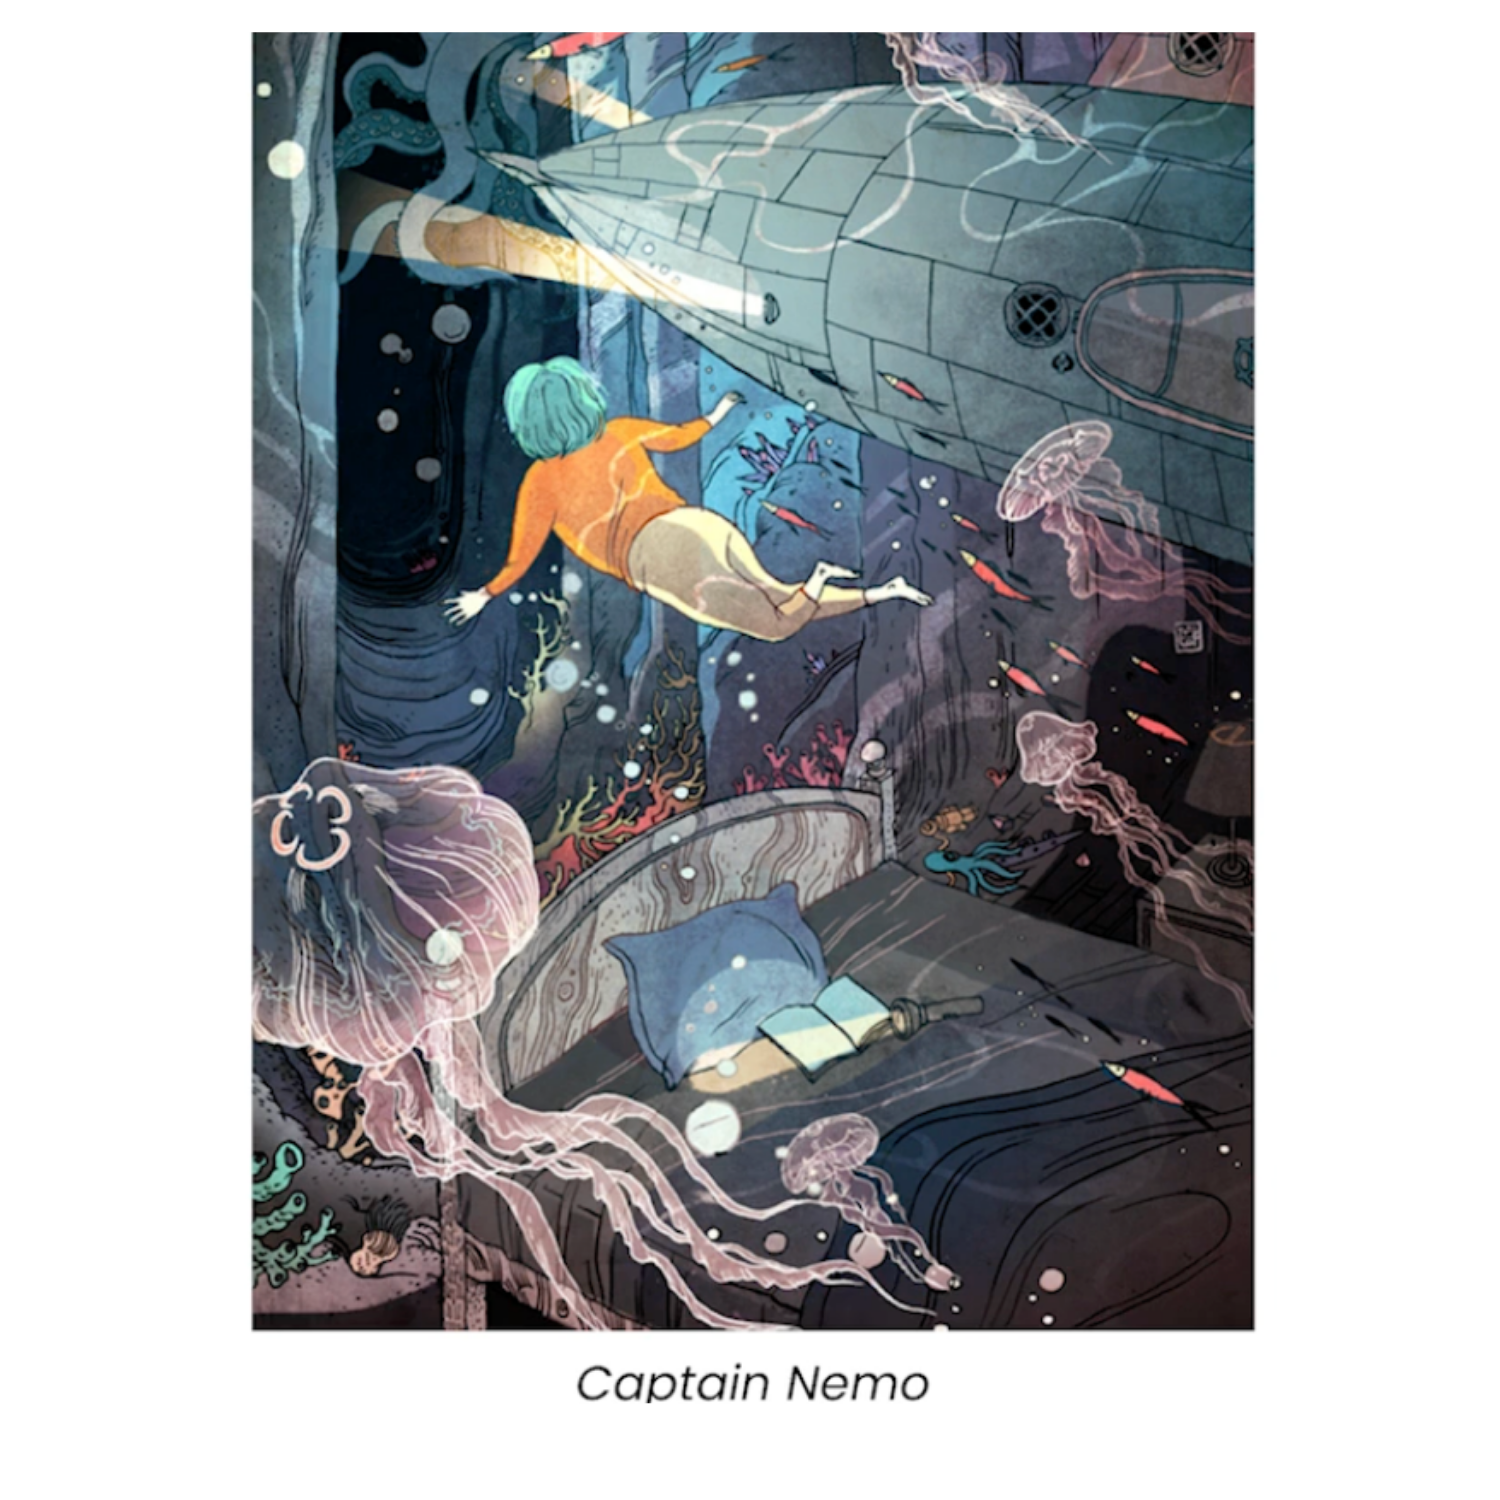
Next, we look at Victo Ngai, an illustrator from Los Angeles. Her drawings are full of action and many small details. Victo Ngai creates interesting characters who travel through very unusual portals. Imagine a portal inside the mouth of a frog! Her art shows how imagination can lead to wild scenes. Her characters go on new adventures and visit places they have never seen. Her art reminds us that new places can be full of wonder.
Anish Kapoor’s Changing Sculptures
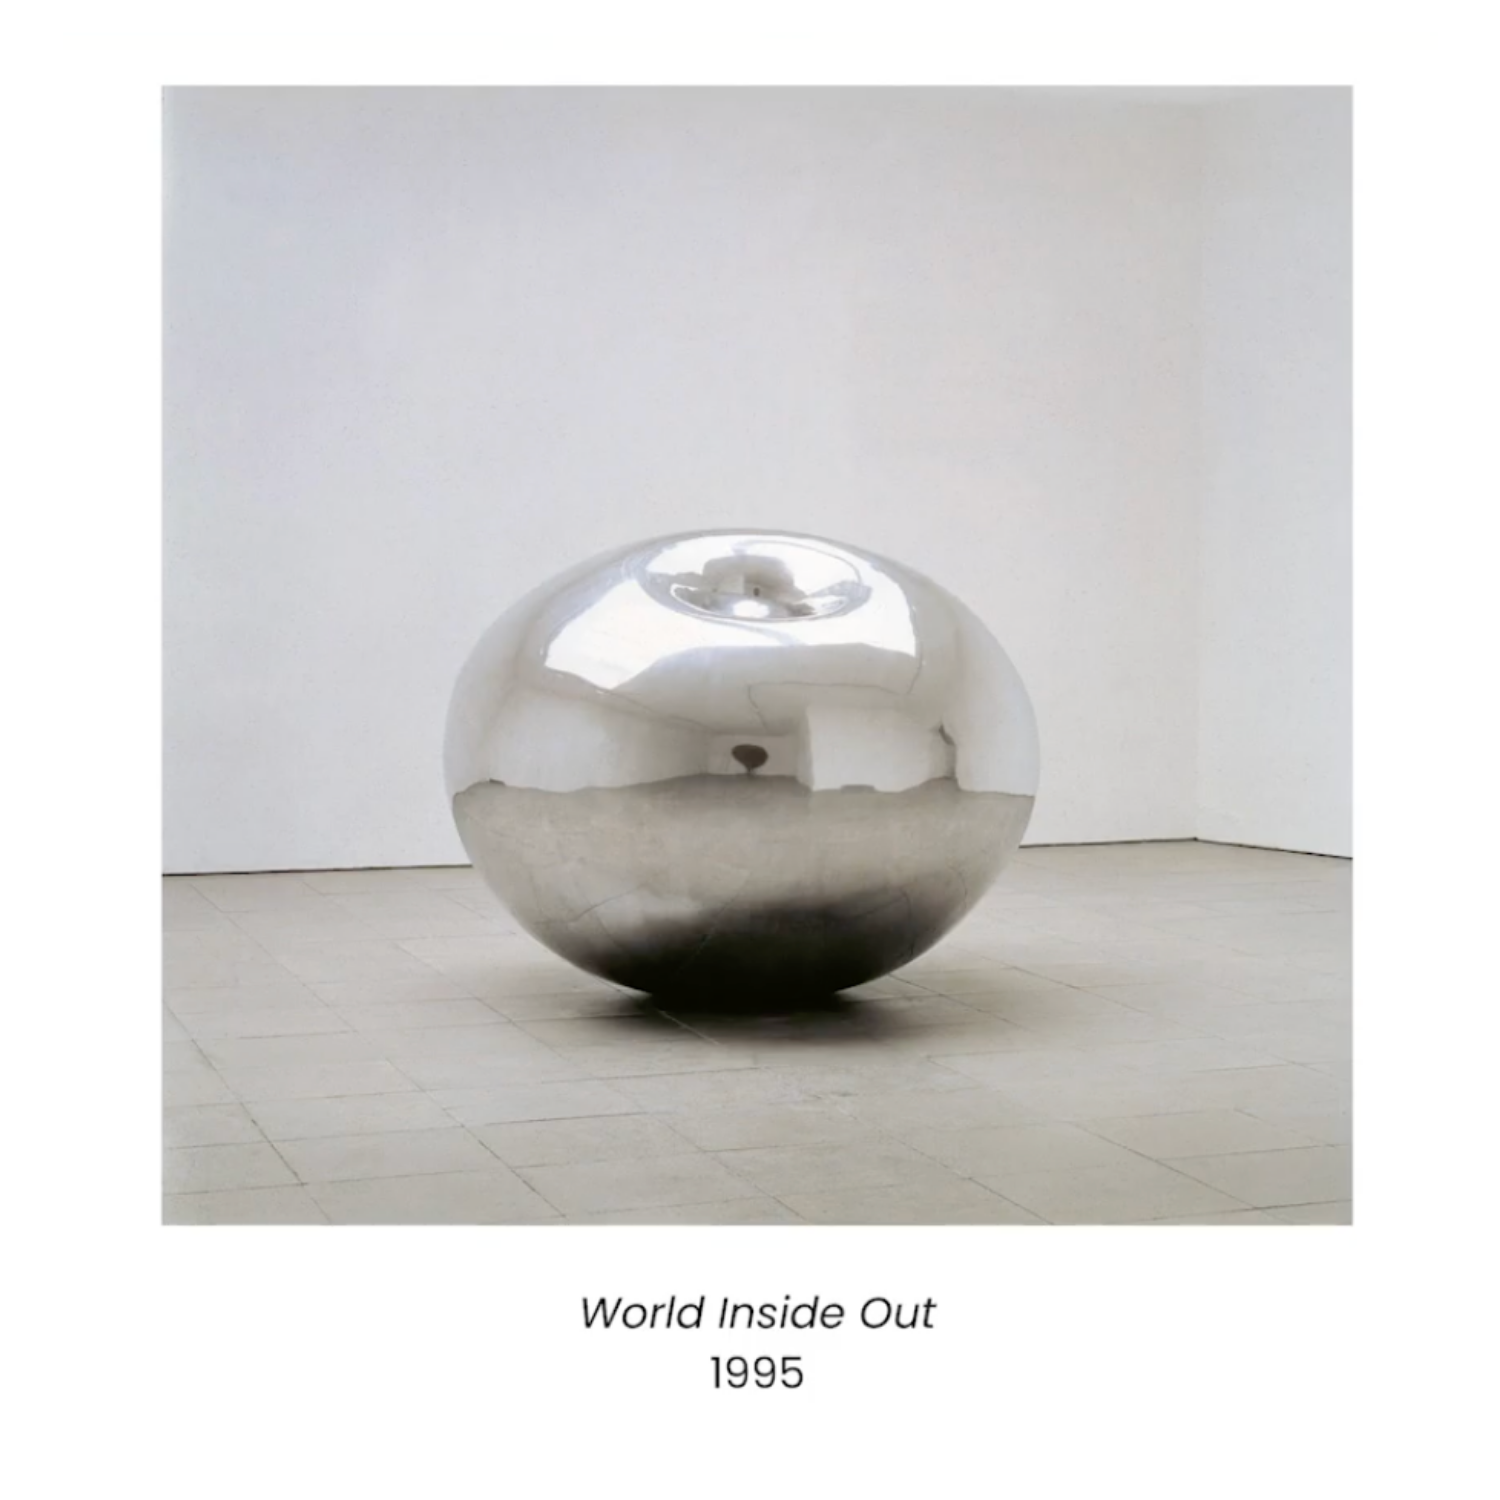
Our last artist is Anish Kapoor. He was born in India and now lives in England. Anish does not paint or draw. He creates amazing sculptures. His artwork is a great example of how artists can show change and transformation in different ways.
One of his famous sculptures is Cloudgate. It looks like a giant, shiny bean in a park in Chicago. The surface is smooth and reflects everything like a mirror. When you look at Cloudgate, you see yourself and the world around you. But the reflections are stretched and bent, like in a funhouse mirror. It shows you, but in a slightly different way. From a distance, Cloudgate truly seems like a portal to another world.
These artists show us how many ways we can think about portals and change. Their work can inspire our own unique ideas.
Gathering Your Art Supplies
Before we start creating our magical portal, make sure you have these art supplies ready:
- Drawing paper
- Colored construction paper
- Pencil
- Eraser
- Sharpie (black marker)
- Scissors
- Glue stick
- Colored pencils (for practicing gradients)
Designing Your Portal
Now it’s time to start drawing! Grab your drawing paper and pencil.
Sketching Your Portal Shape
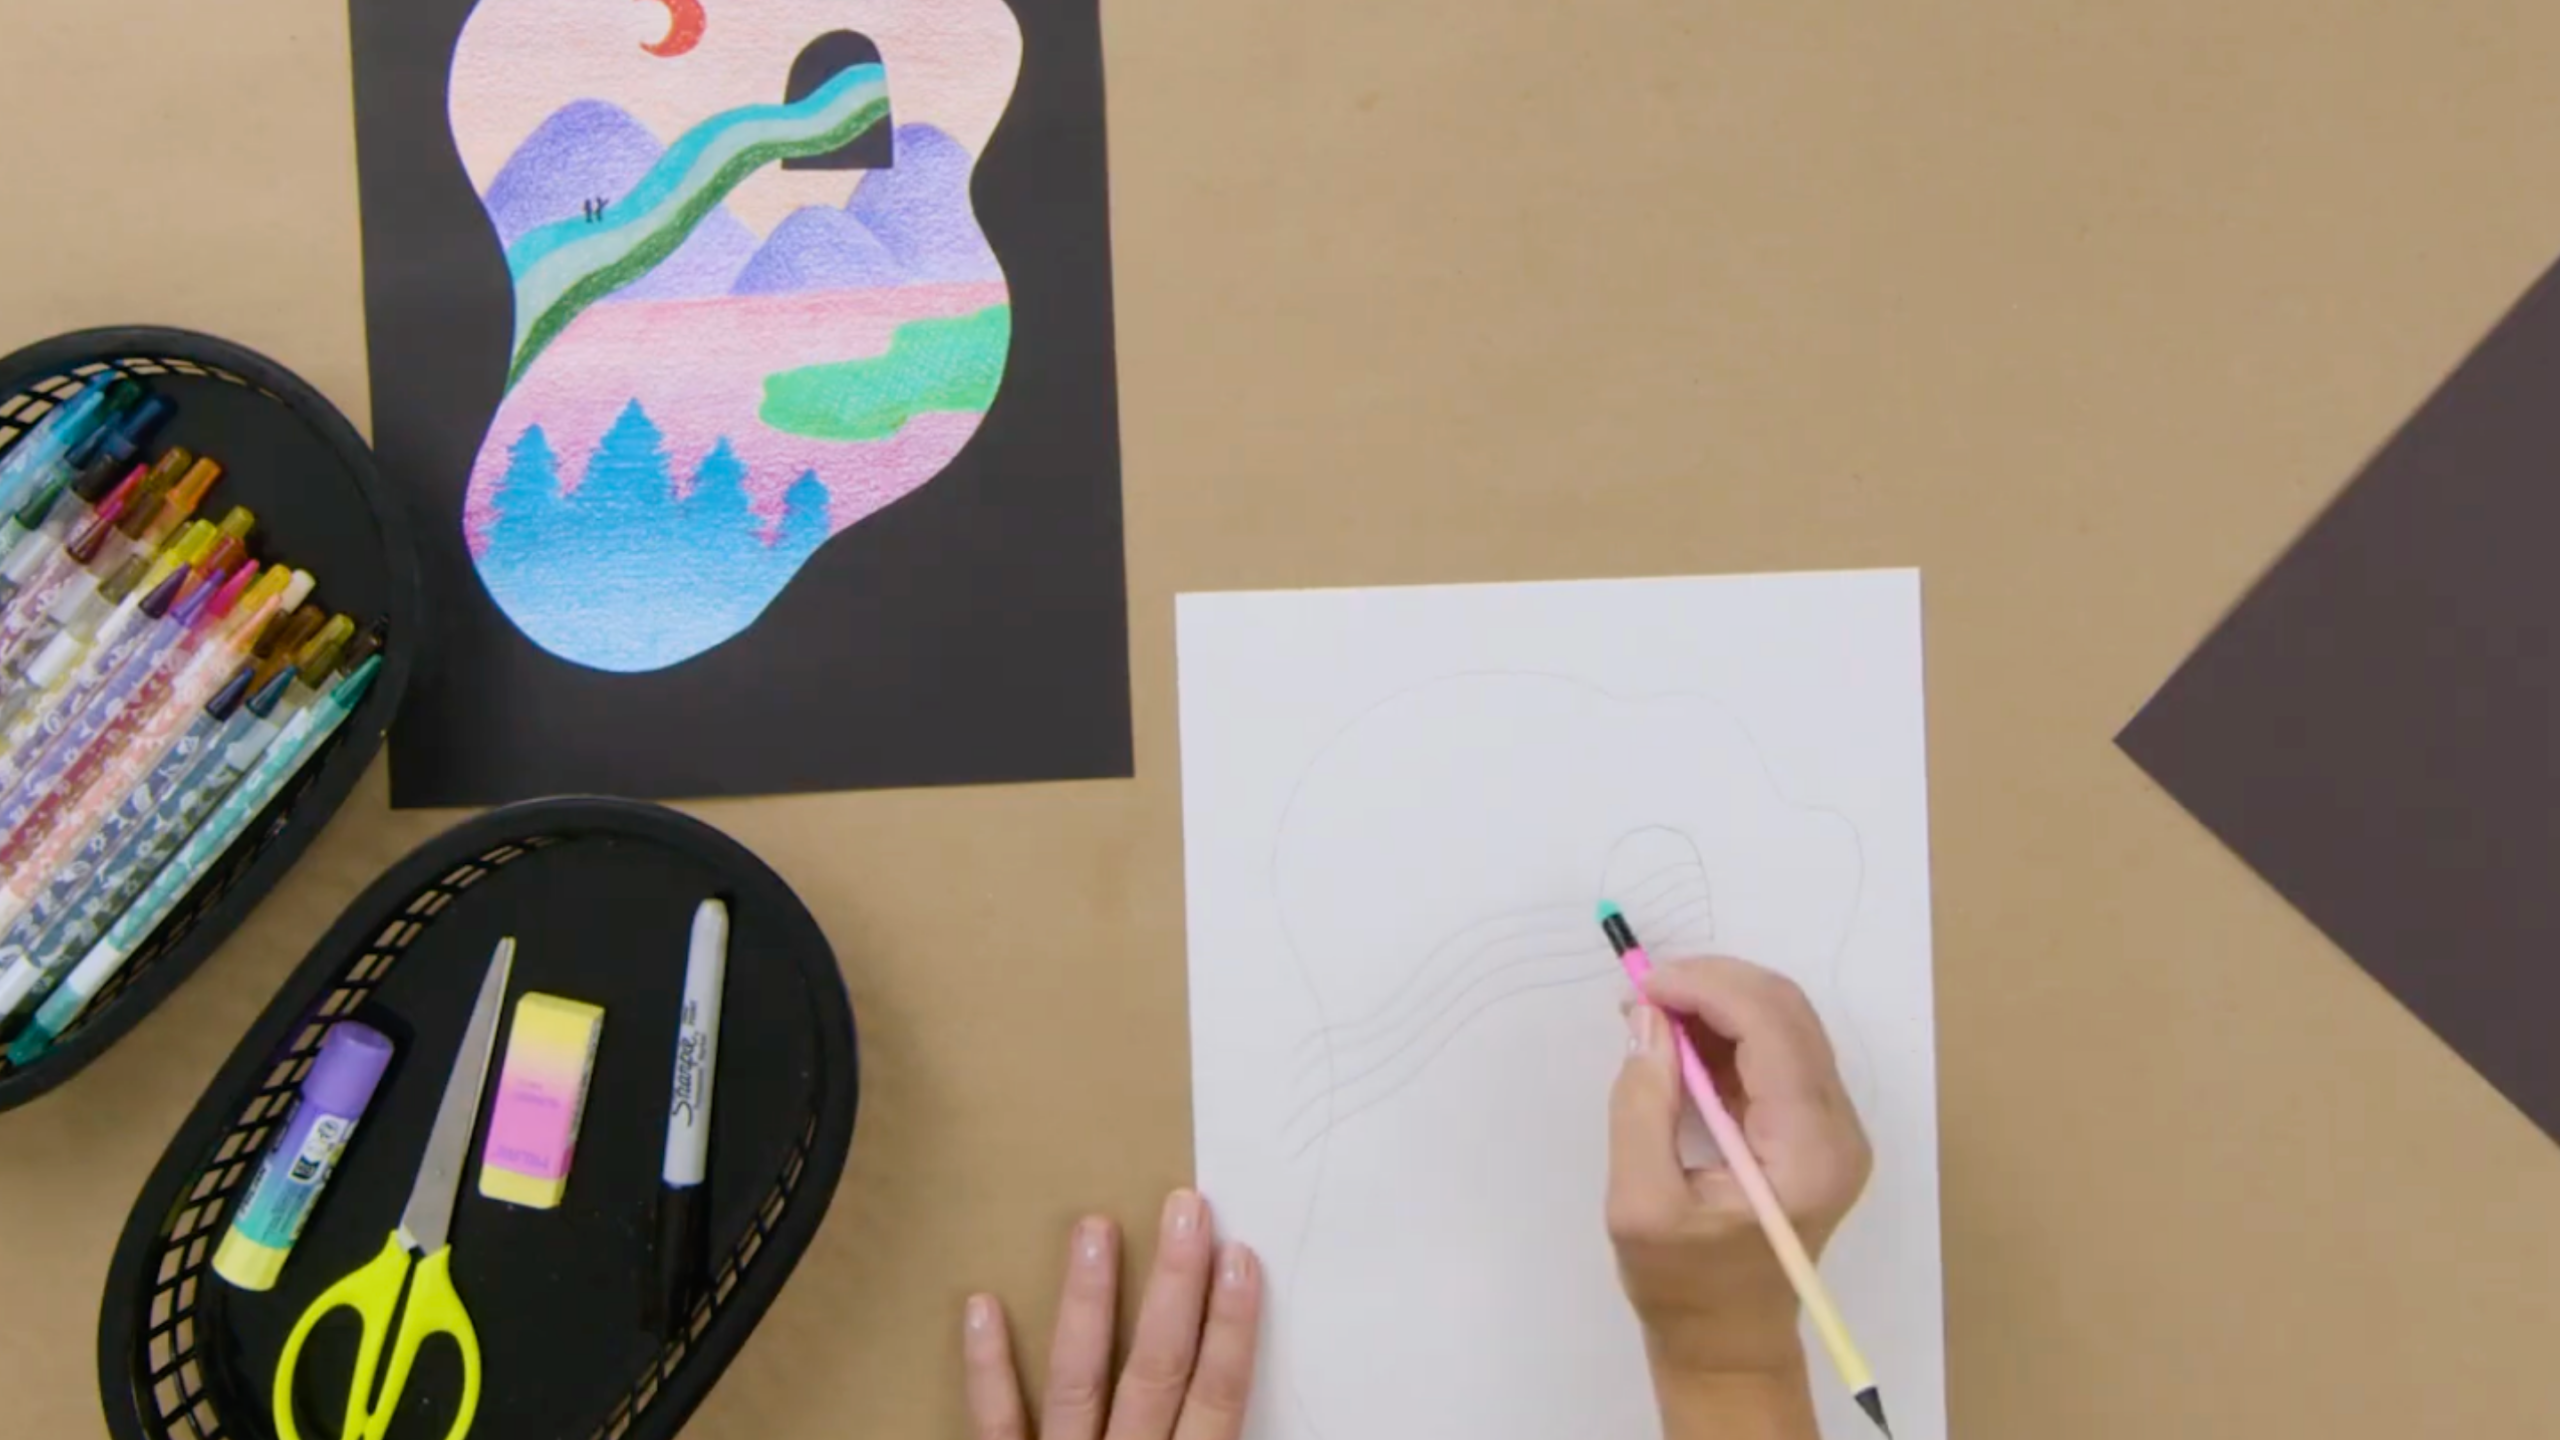
First, draw a rounded shape on your paper. Your paper is square, so an oval, circle, or even a blob-like shape will fit well inside. Draw very lightly. This shape will be the opening of your portal. While Regan Russell’s portals looked like doorways, you can choose any shape you like.
Adding Energy Lines
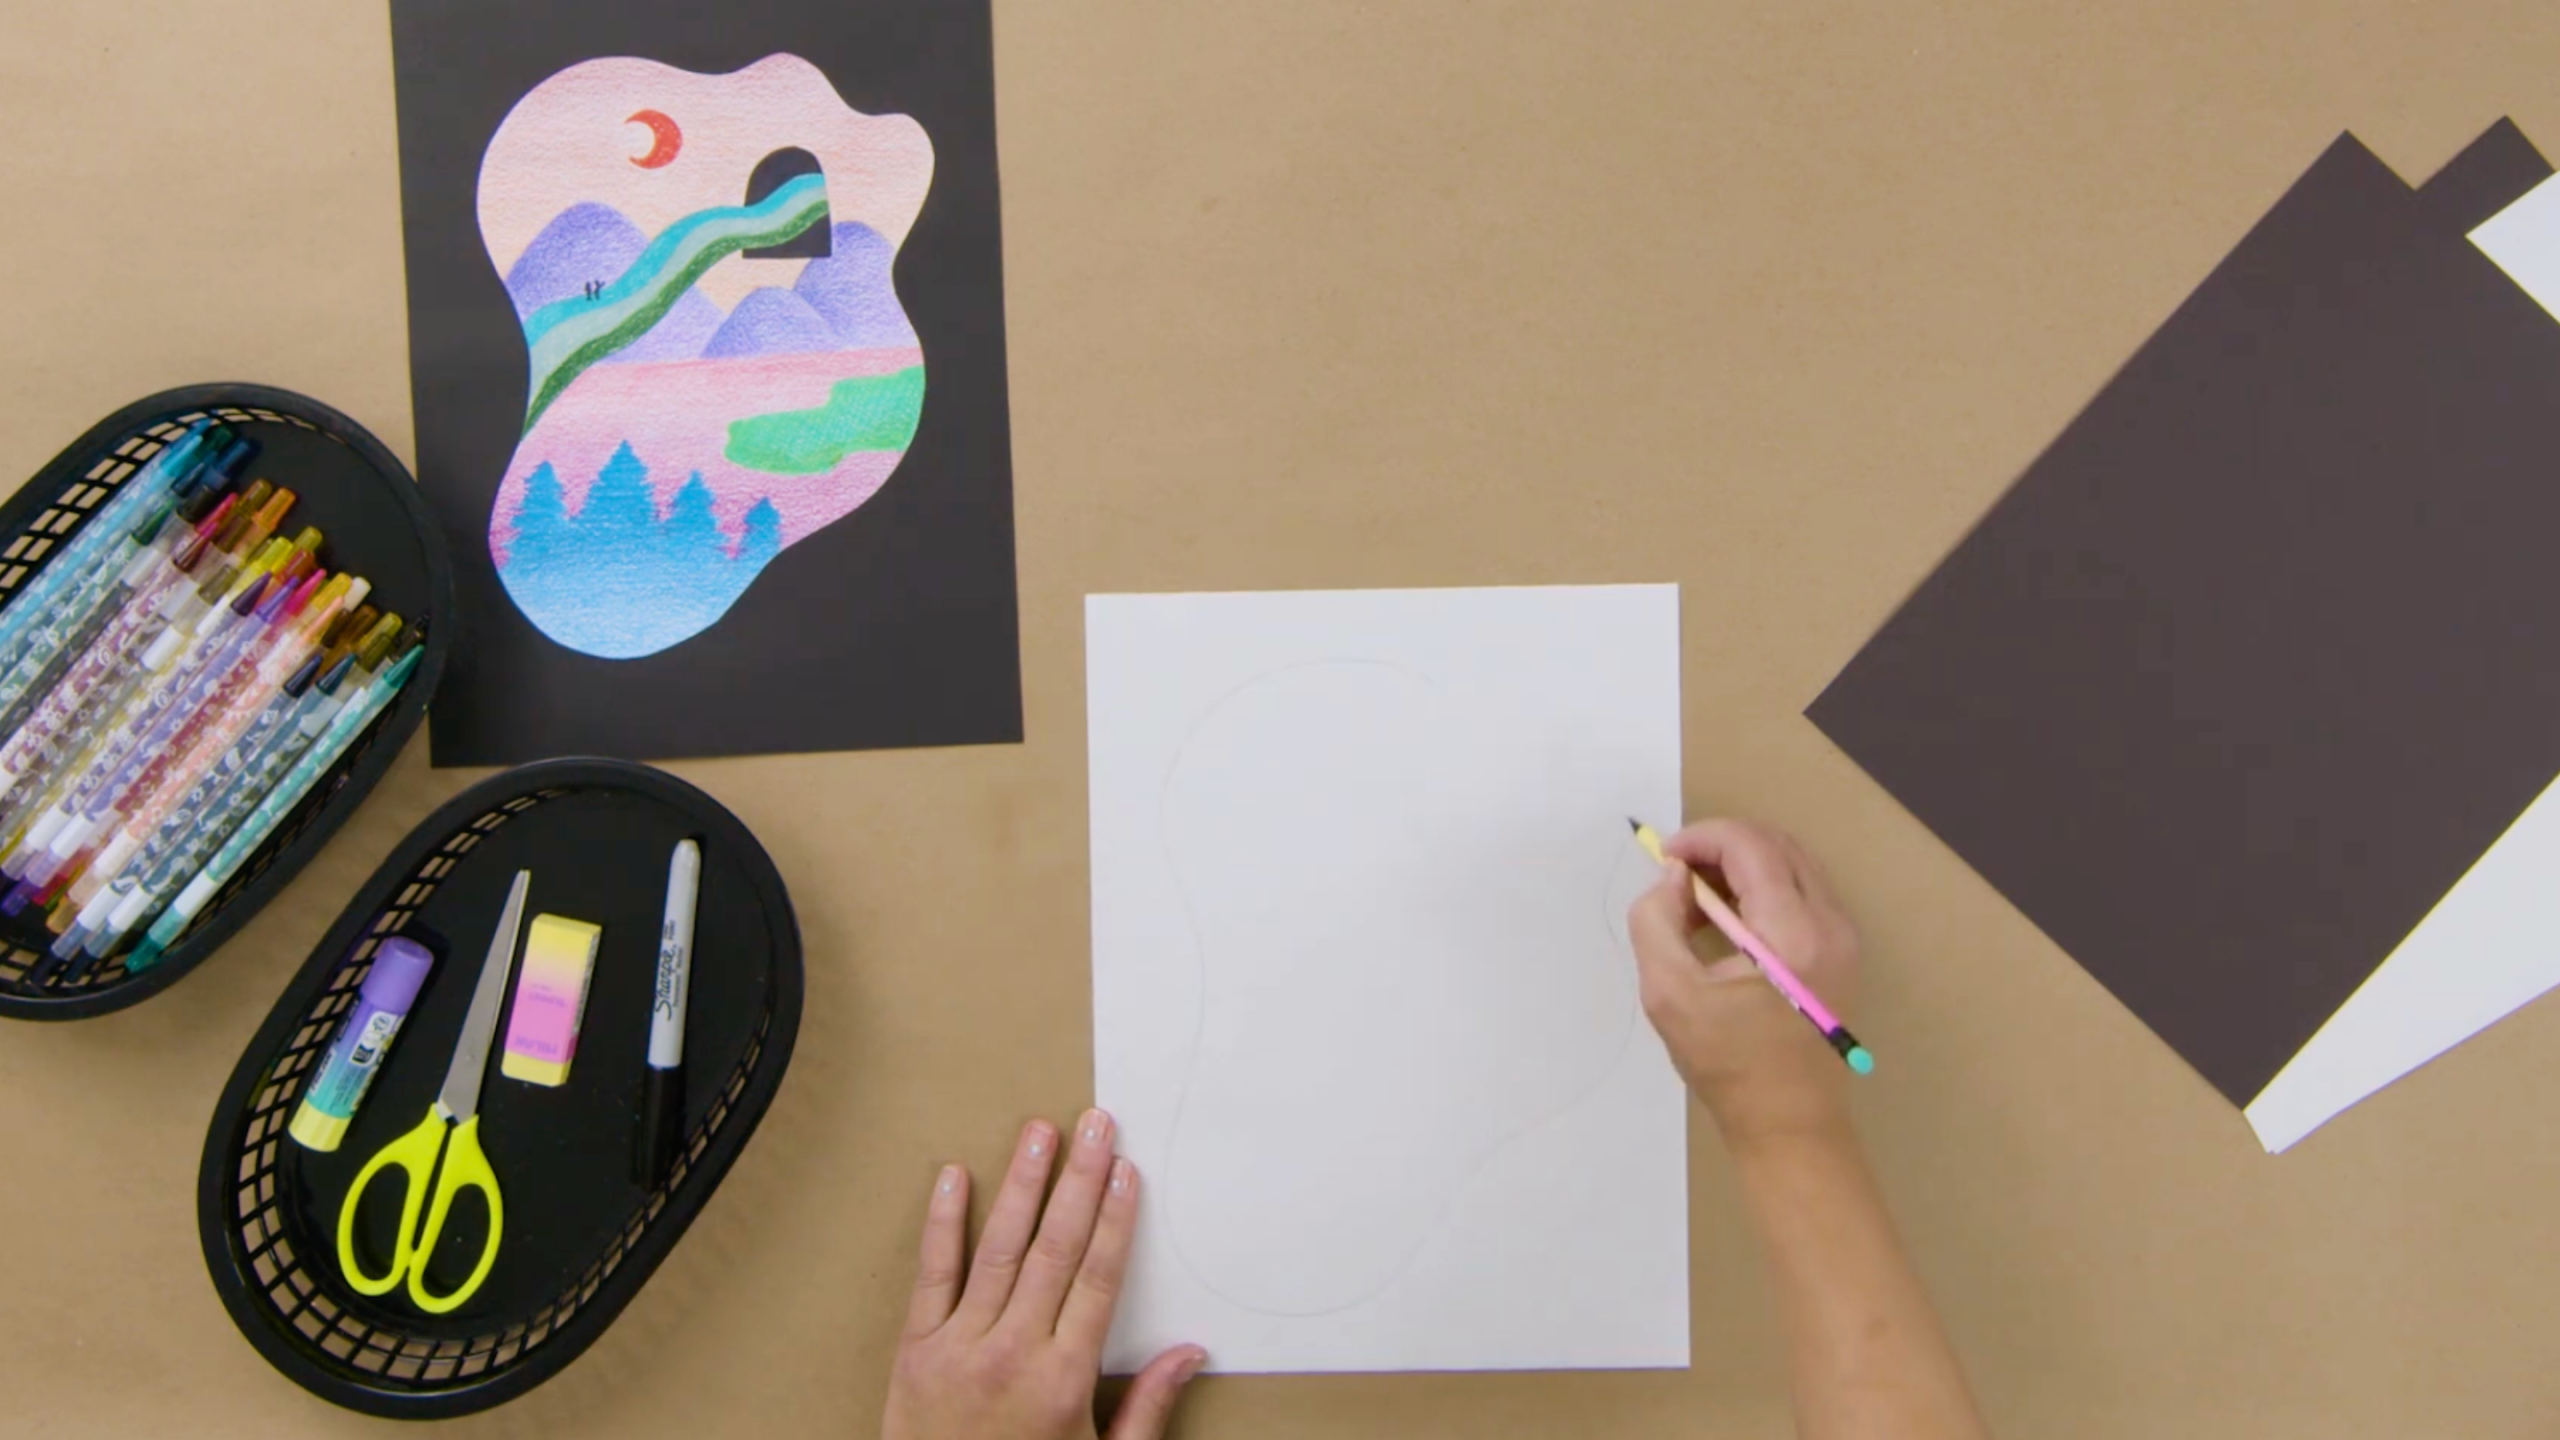
Next, let’s show that something is coming through your portal. Regan Russell used “energy lines” that looked like rainbows. You can draw wavy lines coming out from one side of your portal and going to the edge of your paper. Draw at least three of these lines. They create the illusion of light or energy bursting from within the portal. If any of these lines cross your original portal shape, that’s perfectly fine. You can erase those extra lines later.
Creating Your Landscape
Now, let’s think about the world behind your portal.
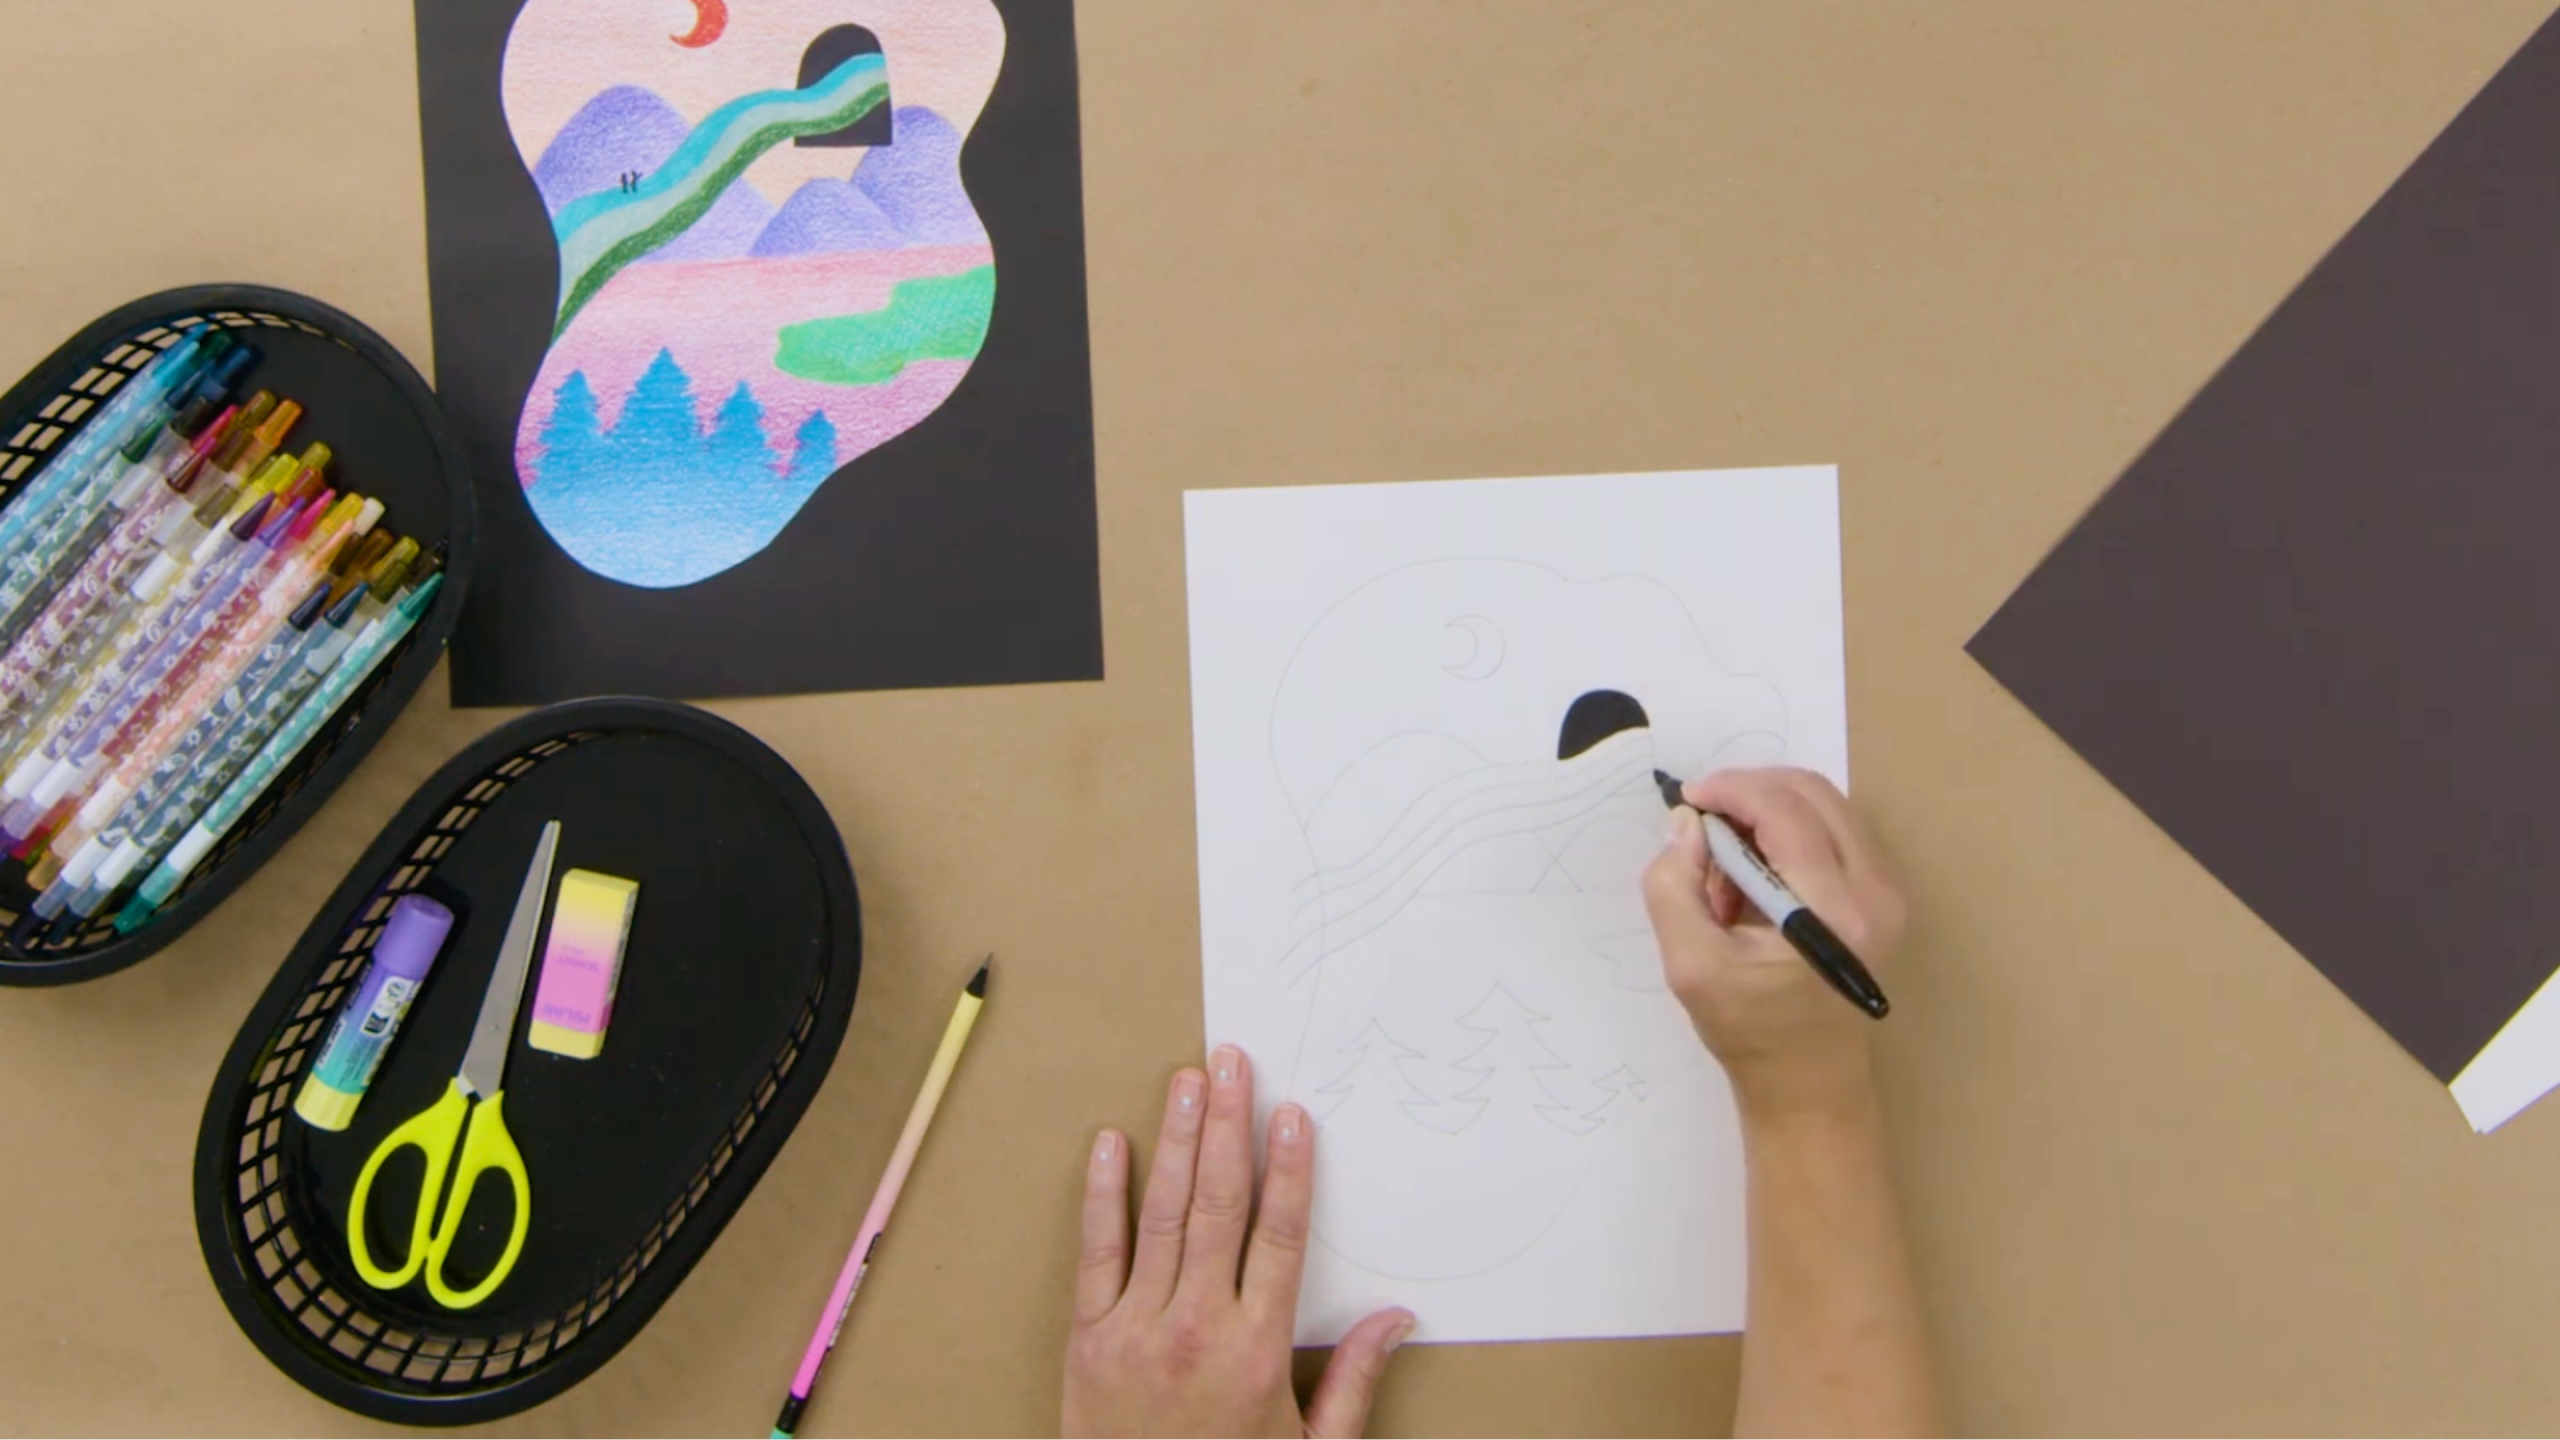
- Draw a Horizon Line: Draw a straight line across the middle of your paper. This is your horizon line, where the sky meets the ground. Everything above it will be the sky, and everything below will be the Earth.
- Choose Your Setting: Where is your portal located? It could be in a desert, on a beach, in outer space, or even on a new planet you invent. For example, you might choose to draw mountains in the background.
- Add Details: Think about the time of day. Is it nighttime with a moon? Is it daytime with a bright sun? Add other features like trees, a forest, or a small lake in the foreground. Sketch these details lightly. Take your time to fill your landscape with elements that excite you.
Inking Your Portal
Once your landscape sketch is complete, set your pencil down. Pick up your black Sharpie.
Regan Russell used black for his portals to create strong contrast. This made his portals stand out and added mystery. We will do the same. Carefully fill in the parts of your portal that are visible behind your energy lines. You might see a top corner and a bottom corner. Make sure not to draw a line connecting these two parts if your “rainbow” lines are coming out from between them. This keeps the illusion of the energy flowing forward.
Coloring with Gradients
Now, get ready to add vibrant colors to your artwork using colored pencils. This is where you practice the gradient technique.
Mastering the Gradient Technique
A gradient is a smooth shift from one color to another, or from a dark shade to a light shade of the same color.
- Choose Your Colors: Select two colors for a section, like the sky. You might choose a lighter red and a darker red for a sunset.
- Hold Your Pencil: Hold your colored pencil far back on the barrel, not close to the tip. This helps you apply color more evenly and lightly.
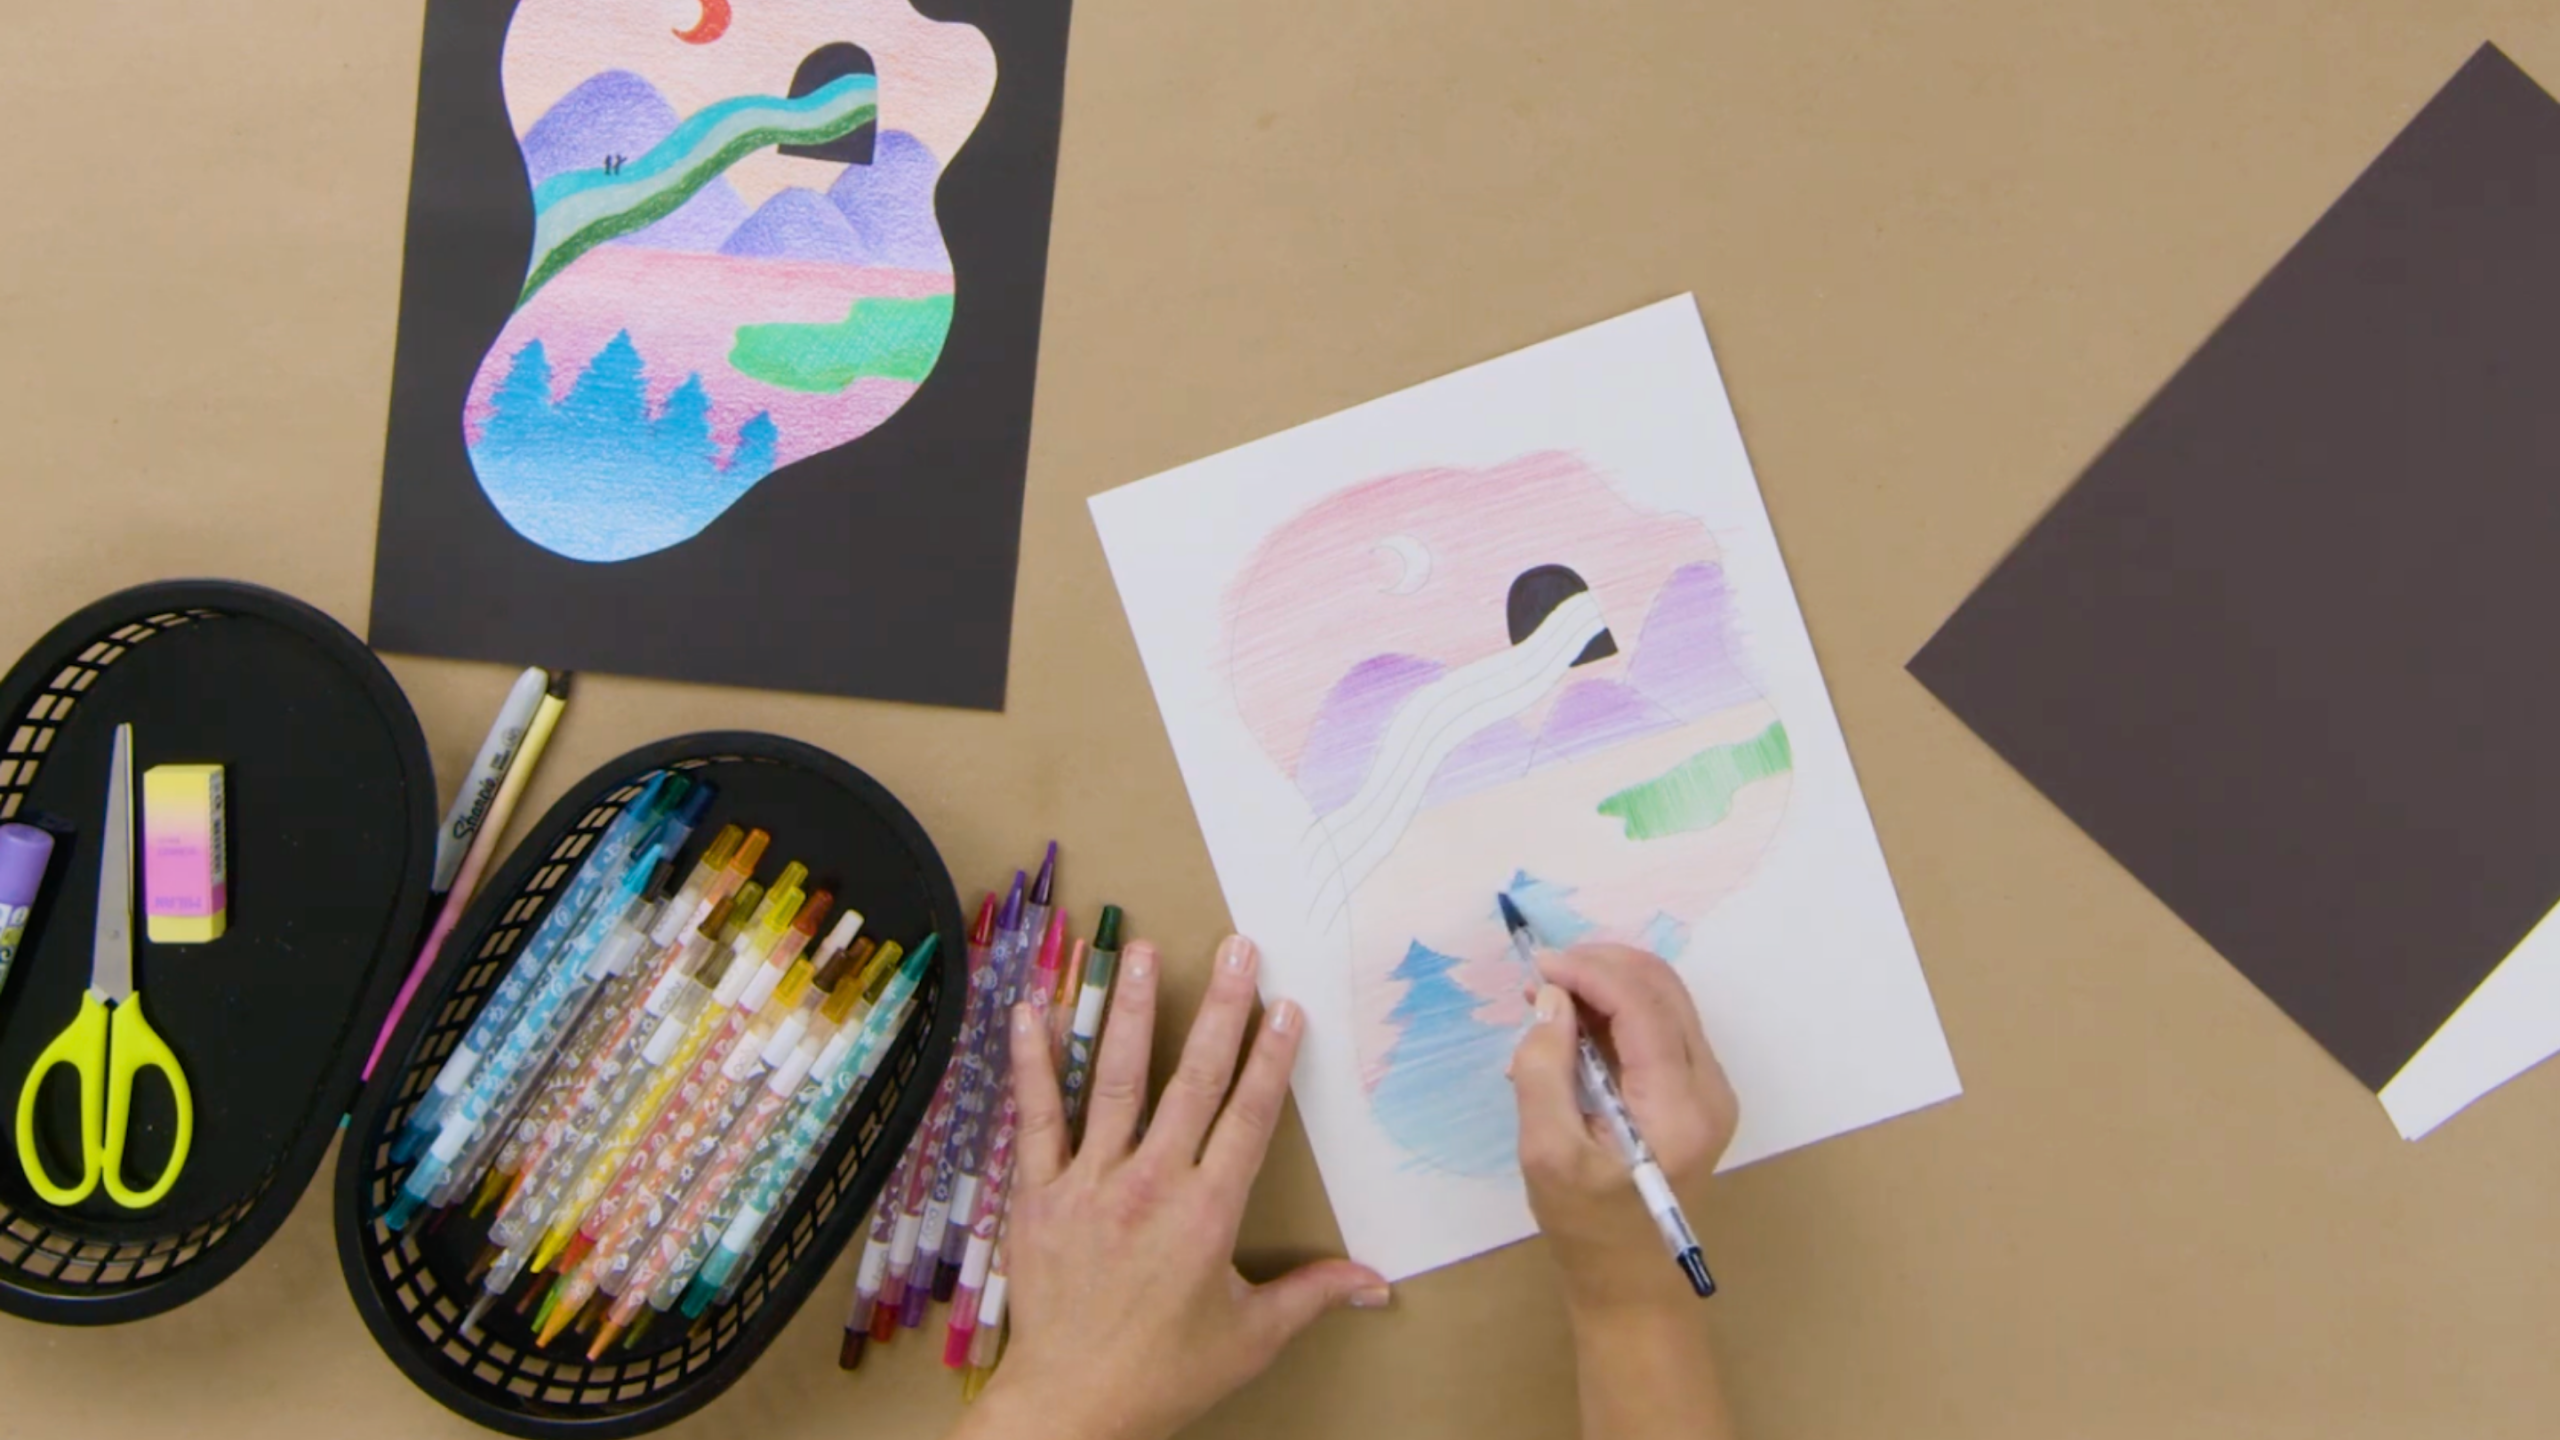
- Apply the Lighter Color: Start with your lighter color. Color in your sky from left to right with a light, even layer. Don’t worry if you color outside the lines a bit; this will help create clean edges later when you cut.
- Layer the Darker Color: Take your darker color. Start at the top of the sky and slowly layer it on top of the lighter color. Keep coloring in the same direction. Blend the colors until you see a smooth change from dark to light.
You can also create a gradient using just one color. Start by pressing harder on one side to make it darker. Then, lighten your pressure as you move to the middle, making the color lighter. This creates a gradient from dark to light using a single colored pencil.
Coloring Your Landscape Elements
Apply the gradient technique to each part of your landscape:
- Mountains: Choose two shades of purple or gray. Use your chosen method to create a smooth gradient on each mountain. Think about how light hits the mountain tops.
- Ground: Use colors like peach and pink. You might want the bottom of the ground to be darker, so start your darker color from the bottom and blend upwards.
- Lake: Try a turquoise color. You can go up and down instead of left to right for your coloring direction here. Experiment with a one-color gradient, making the edges darker and the middle lighter.
- Trees: Use two shades of green or blue. Start with one color, then add the darker shade to the tops of the trees, blending downwards.
The more you practice, the better you will get at gradients. Keep your coloring as vibrant as possible. Bright colors will stand out beautifully against a black background later.
Coloring the Rainbow and Moon
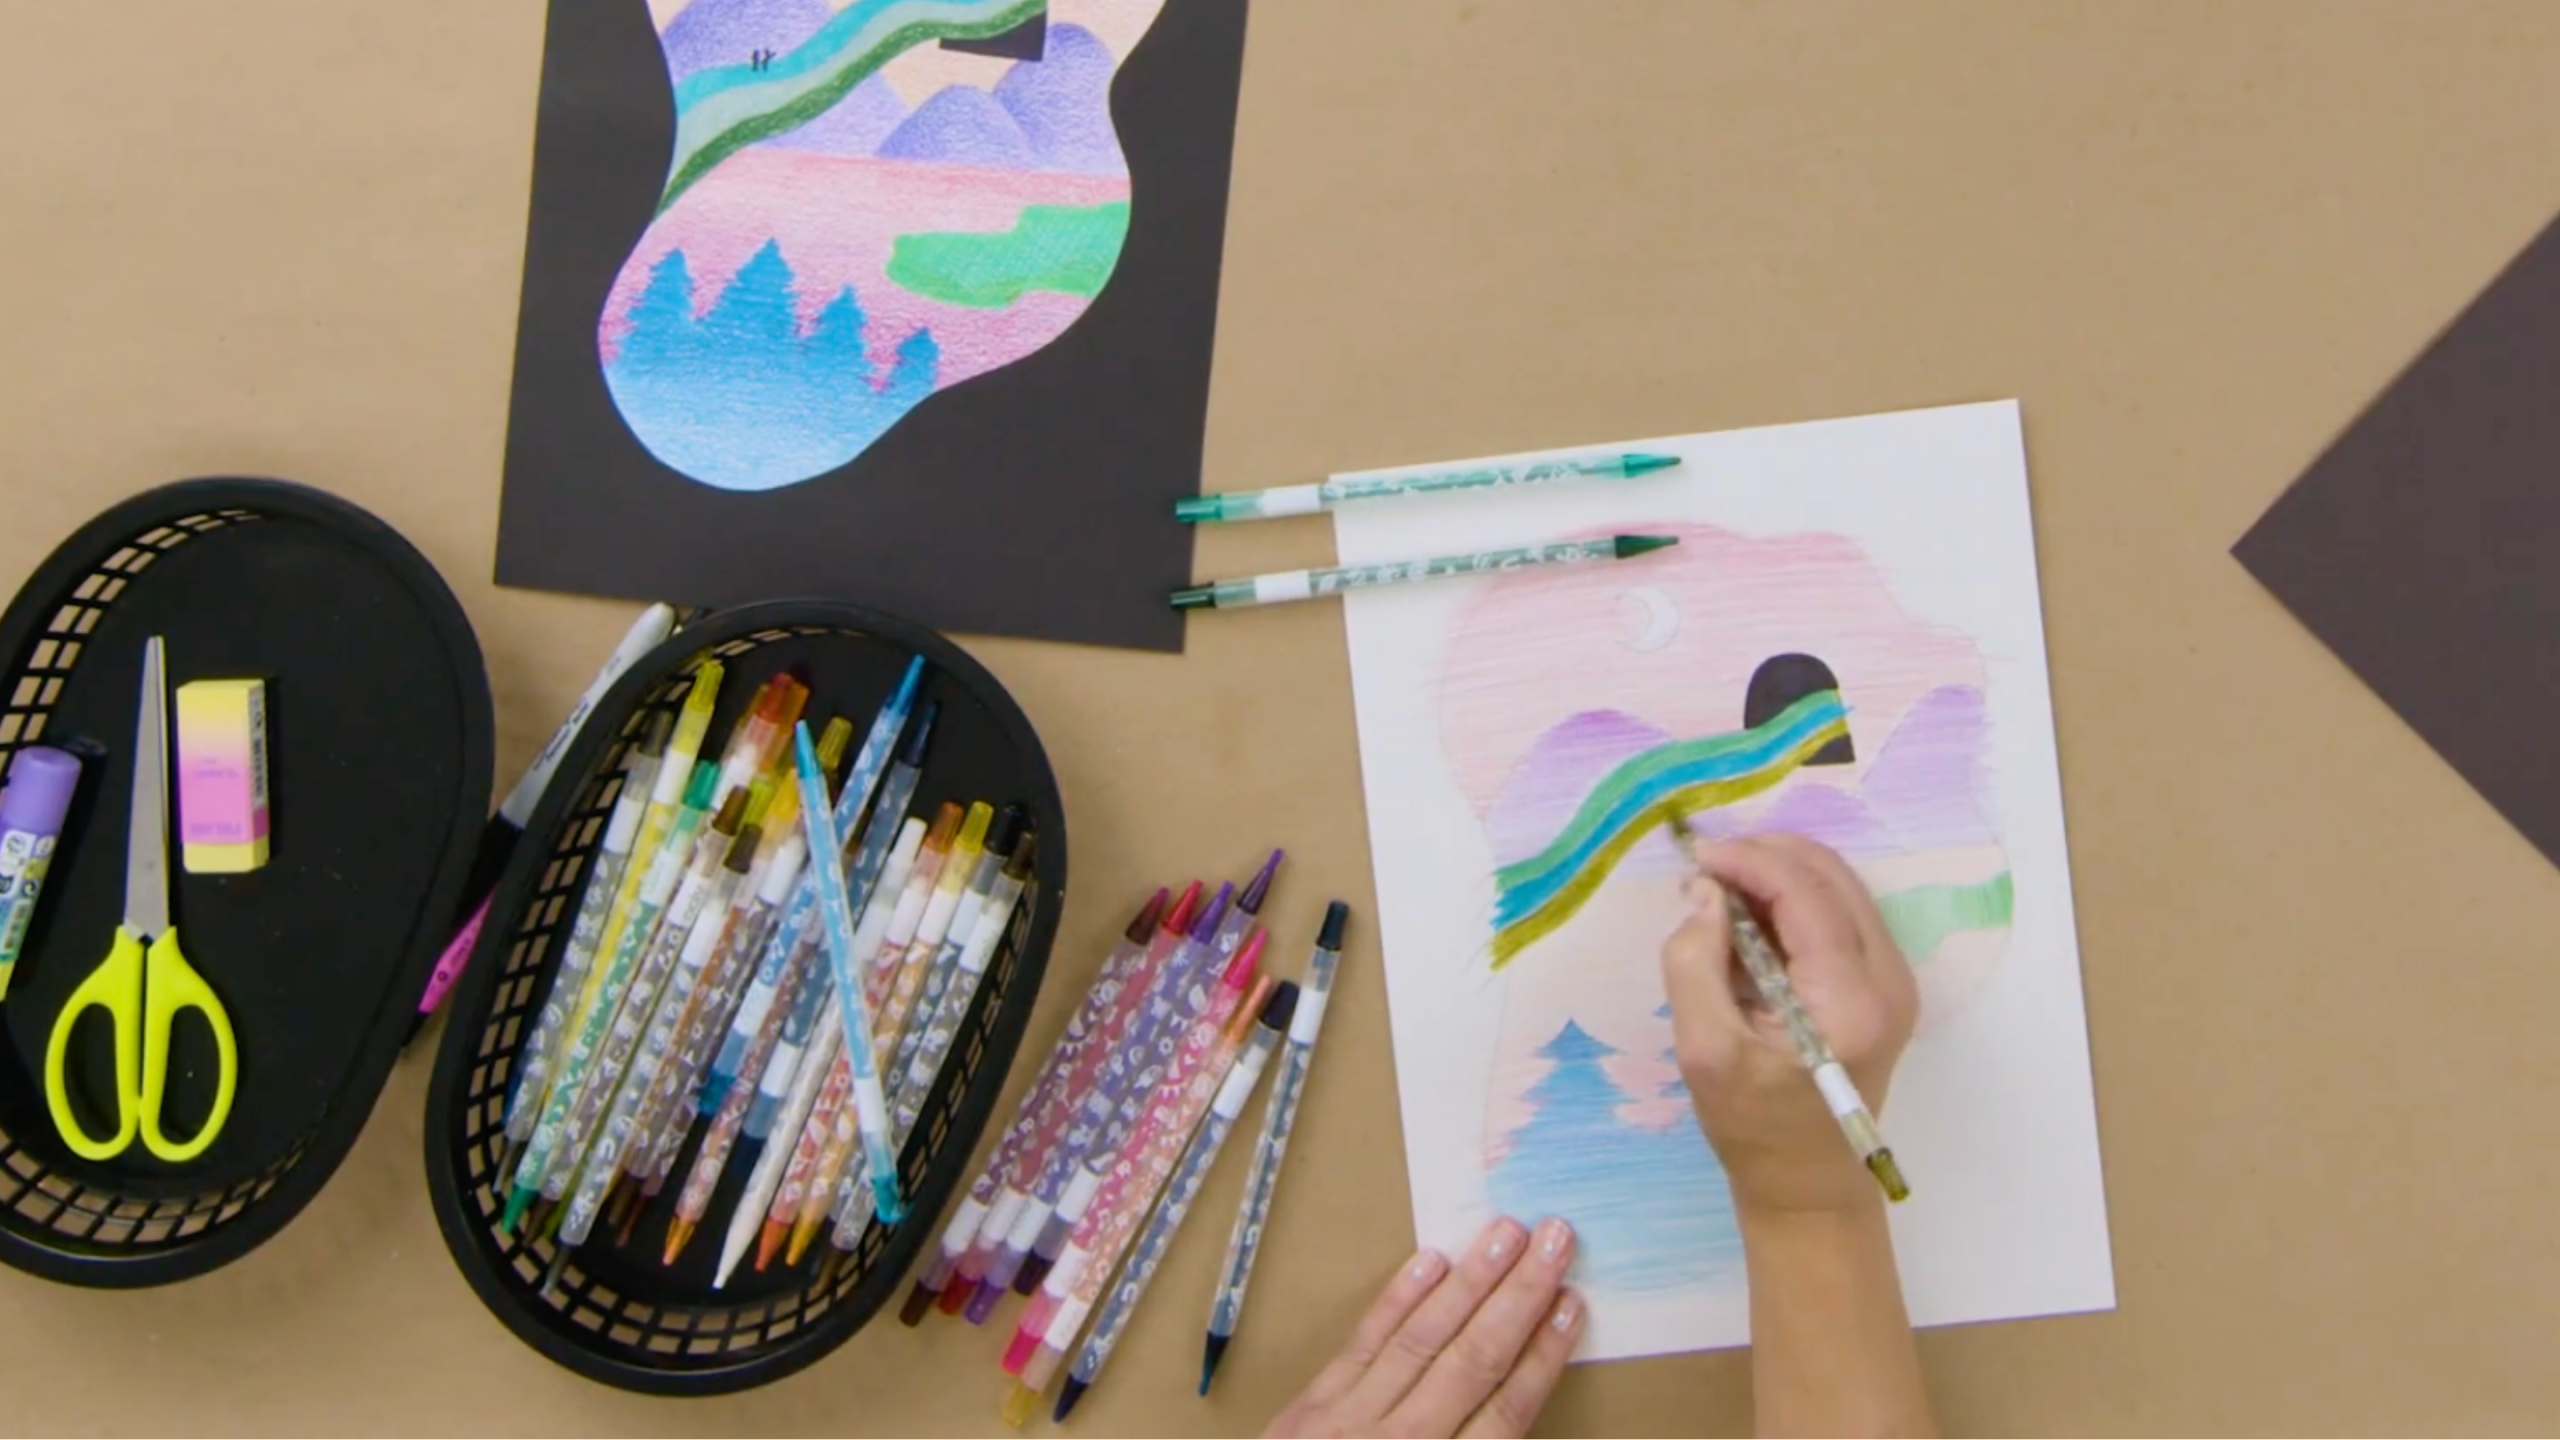
Now let’s color the energy lines coming from your portal and any celestial bodies like the moon. For these, we want them to really pop and stand out against your gradient background.
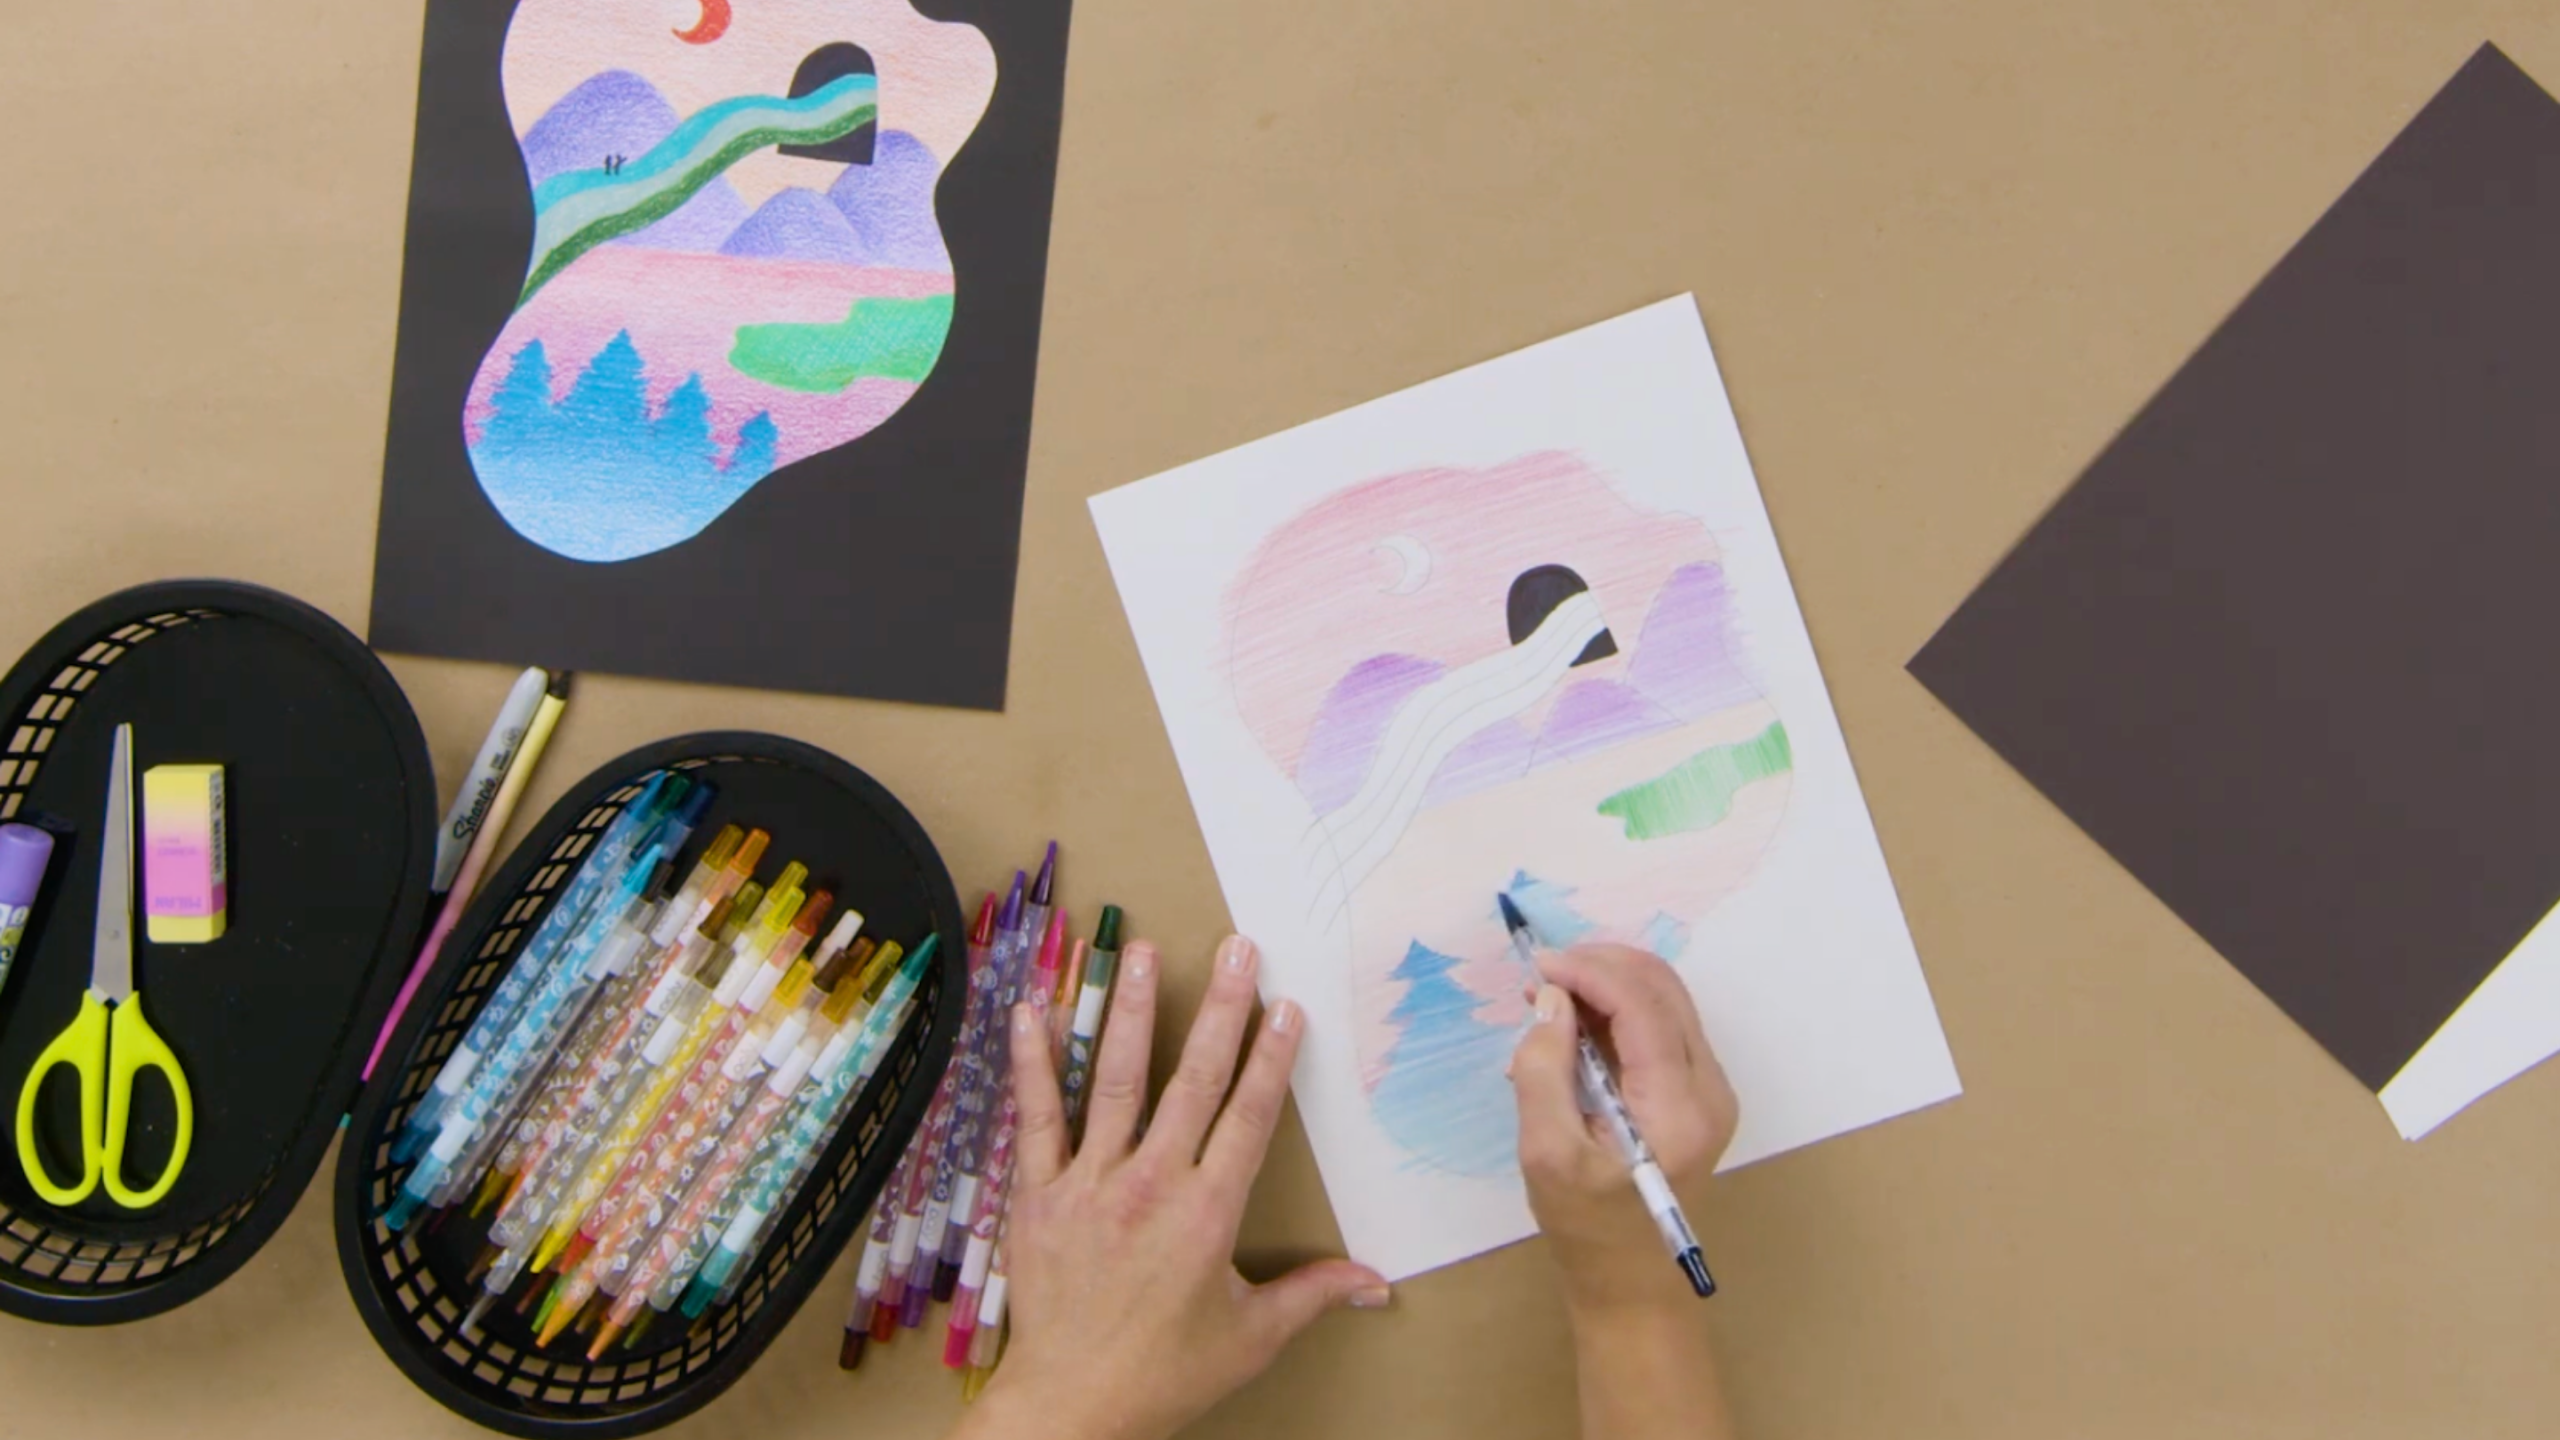
- Choose Bold Colors: Select a few bright, strong colors for your “rainbow” stripes. These colors don’t have to be traditional rainbow colors; pick what you like!
- Color Boldly: Hold your colored pencil closer to the tip, like you’re writing. Press harder to apply the color darkly and evenly. Color each stripe all the way to the edge of your paper. Notice how these bold, flat colors contrast with your blended gradients.
- Color the Moon (or Sun): Choose a bright color for your moon, like a bold red. You can outline it first to help you stay within the lines. Then, fill it in with strong, dark color.
Look over your drawing. If any areas need more color or touching up, now is the time to refine them.
Adding a Small Figure and Finishing Touches
We’re almost done! Let’s add one final detail to your portal drawing.
Drawing a Tiny Figure
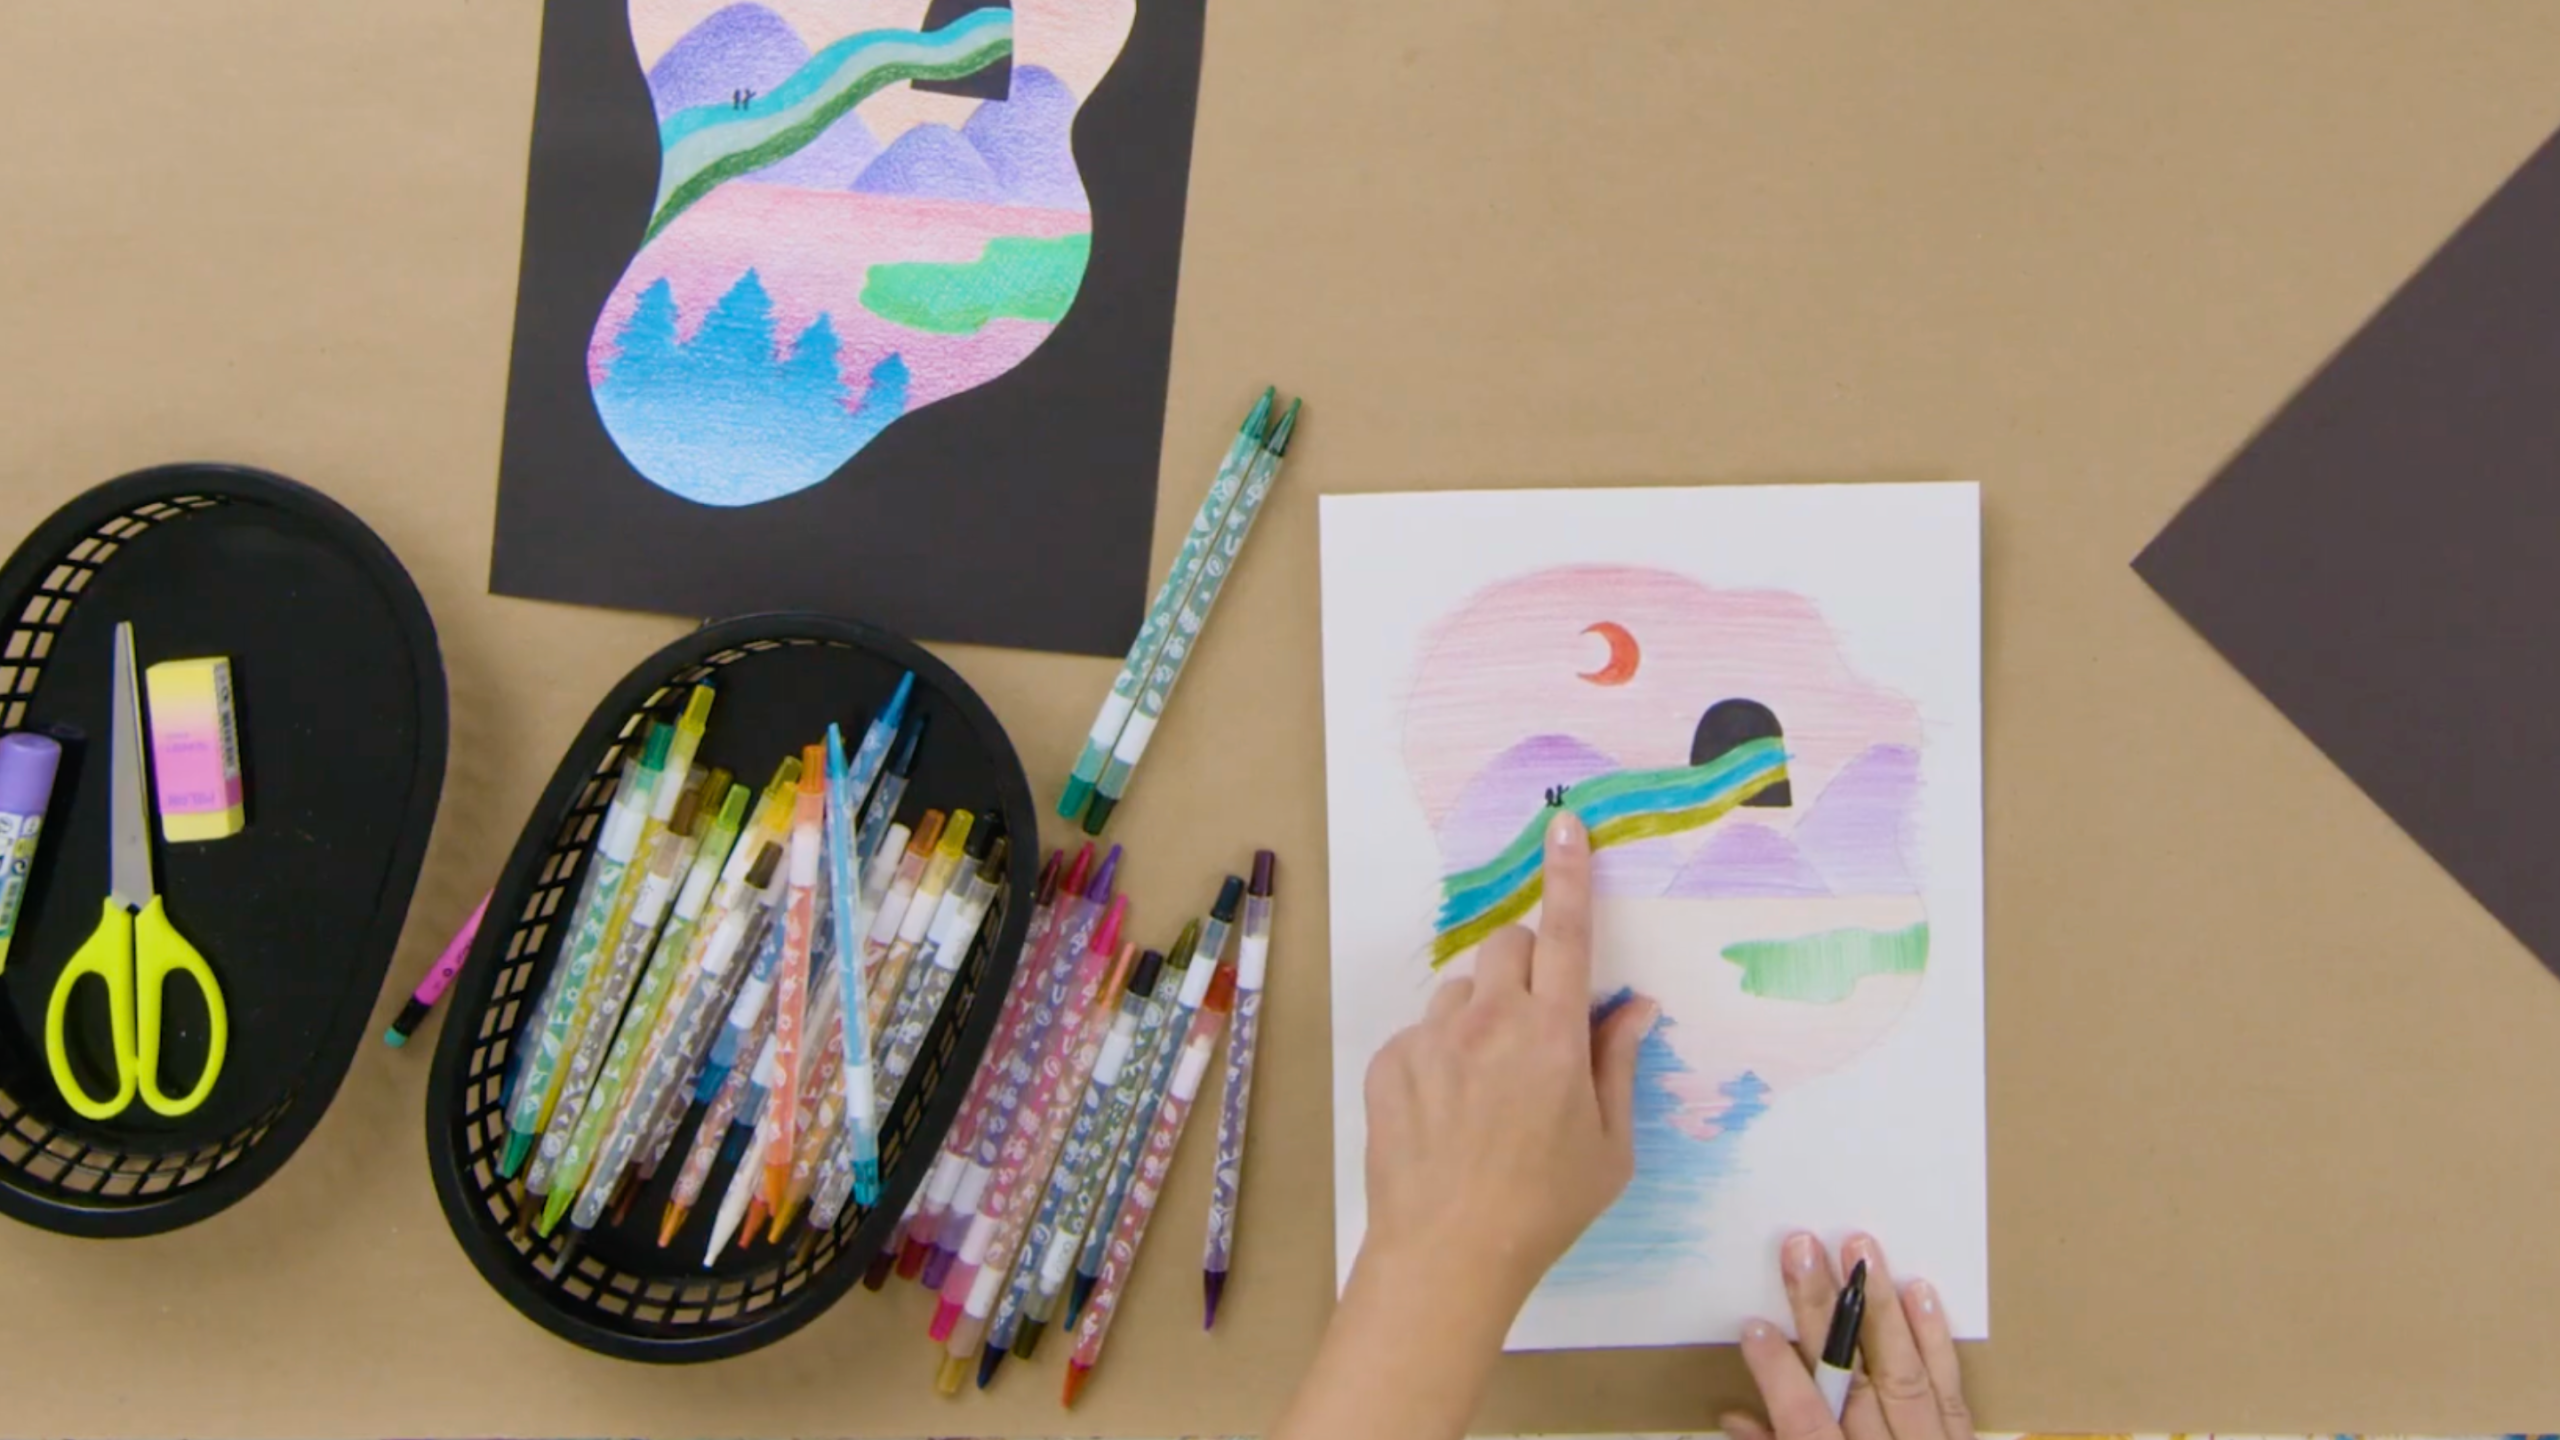
We want to show how large and grand your portal is. One way to do this is by adding a small figure of yourself, or you and a friend, on one of the “rainbow” lines. These lines can act as a bridge leading into the portal.
Take your black Sharpie again. Instead of drawing tiny details, draw a silhouette. A silhouette is just the outline of a figure filled in with solid color. Draw yourself (and a friend if you wish) very small, walking towards the portal. This small size makes the portal appear huge, creating a sense of scale in your artwork. Scale helps us understand how big or small things are in relation to each other.
Cutting and Mounting Your Artwork
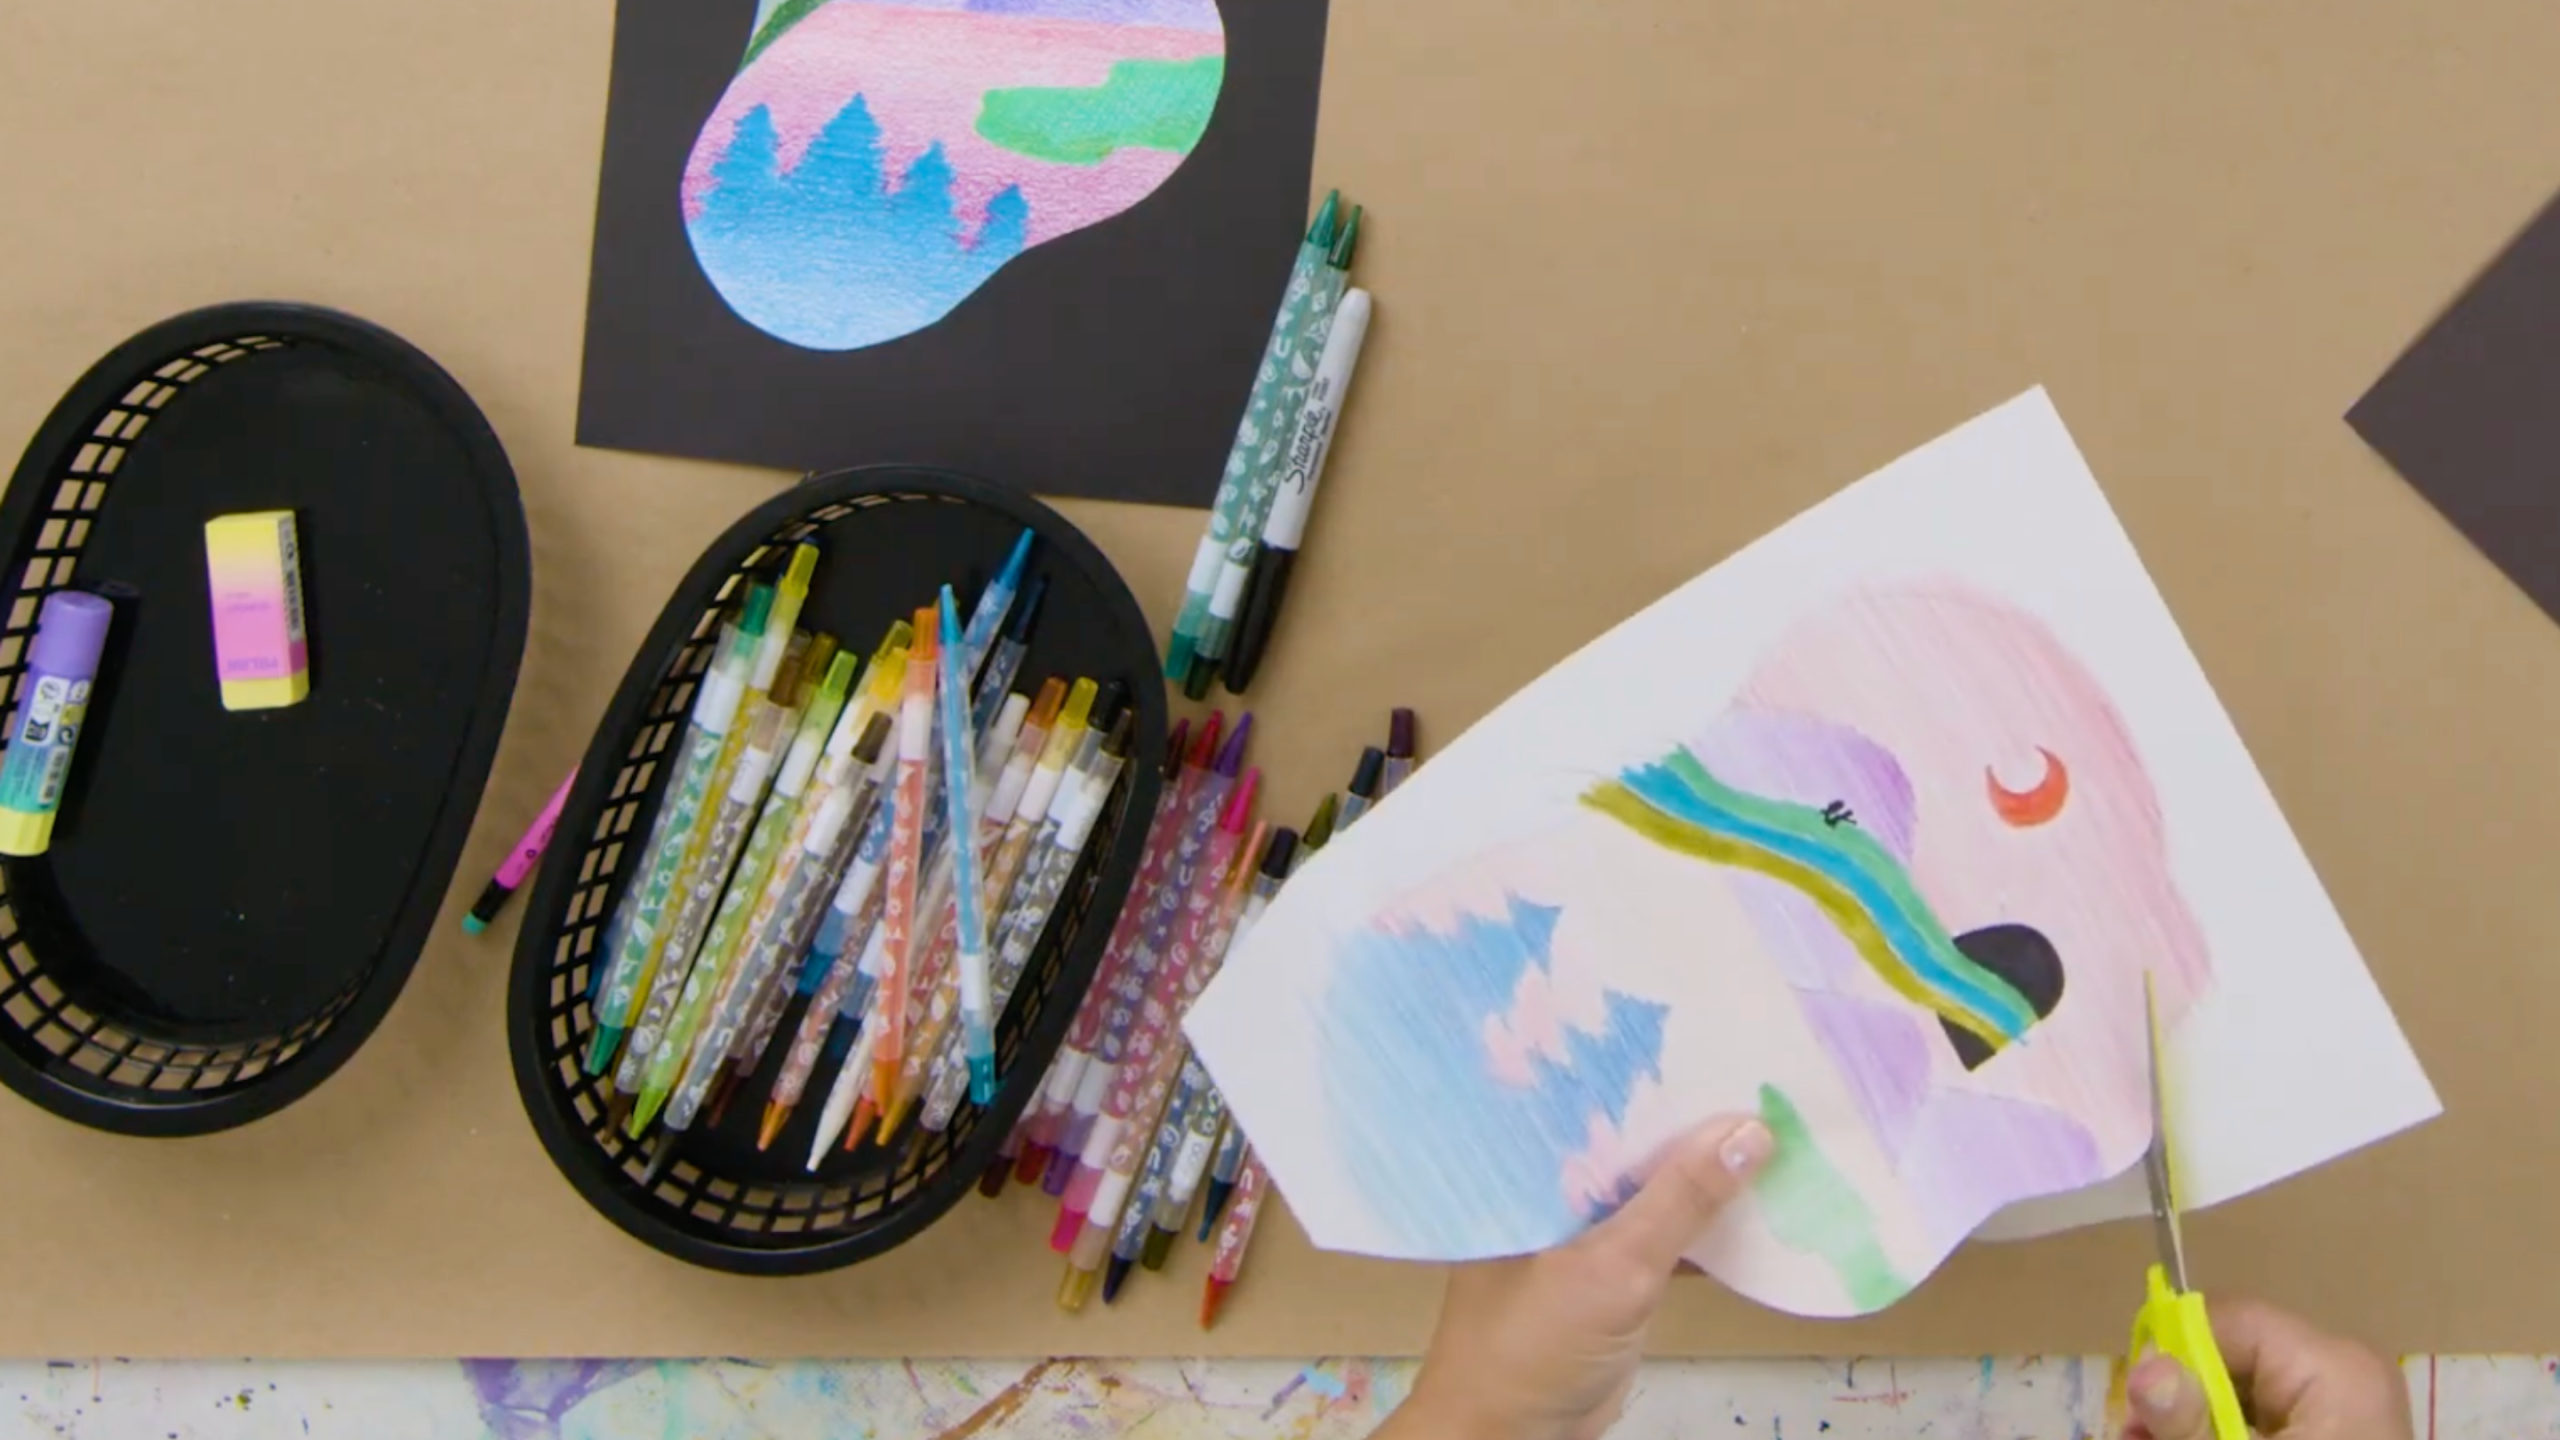
- Cut Out Your Portal: Grab your scissors. Carefully cut around the rounded outline of your main portal drawing. Because you colored slightly past the lines earlier, your edges will look very clean.
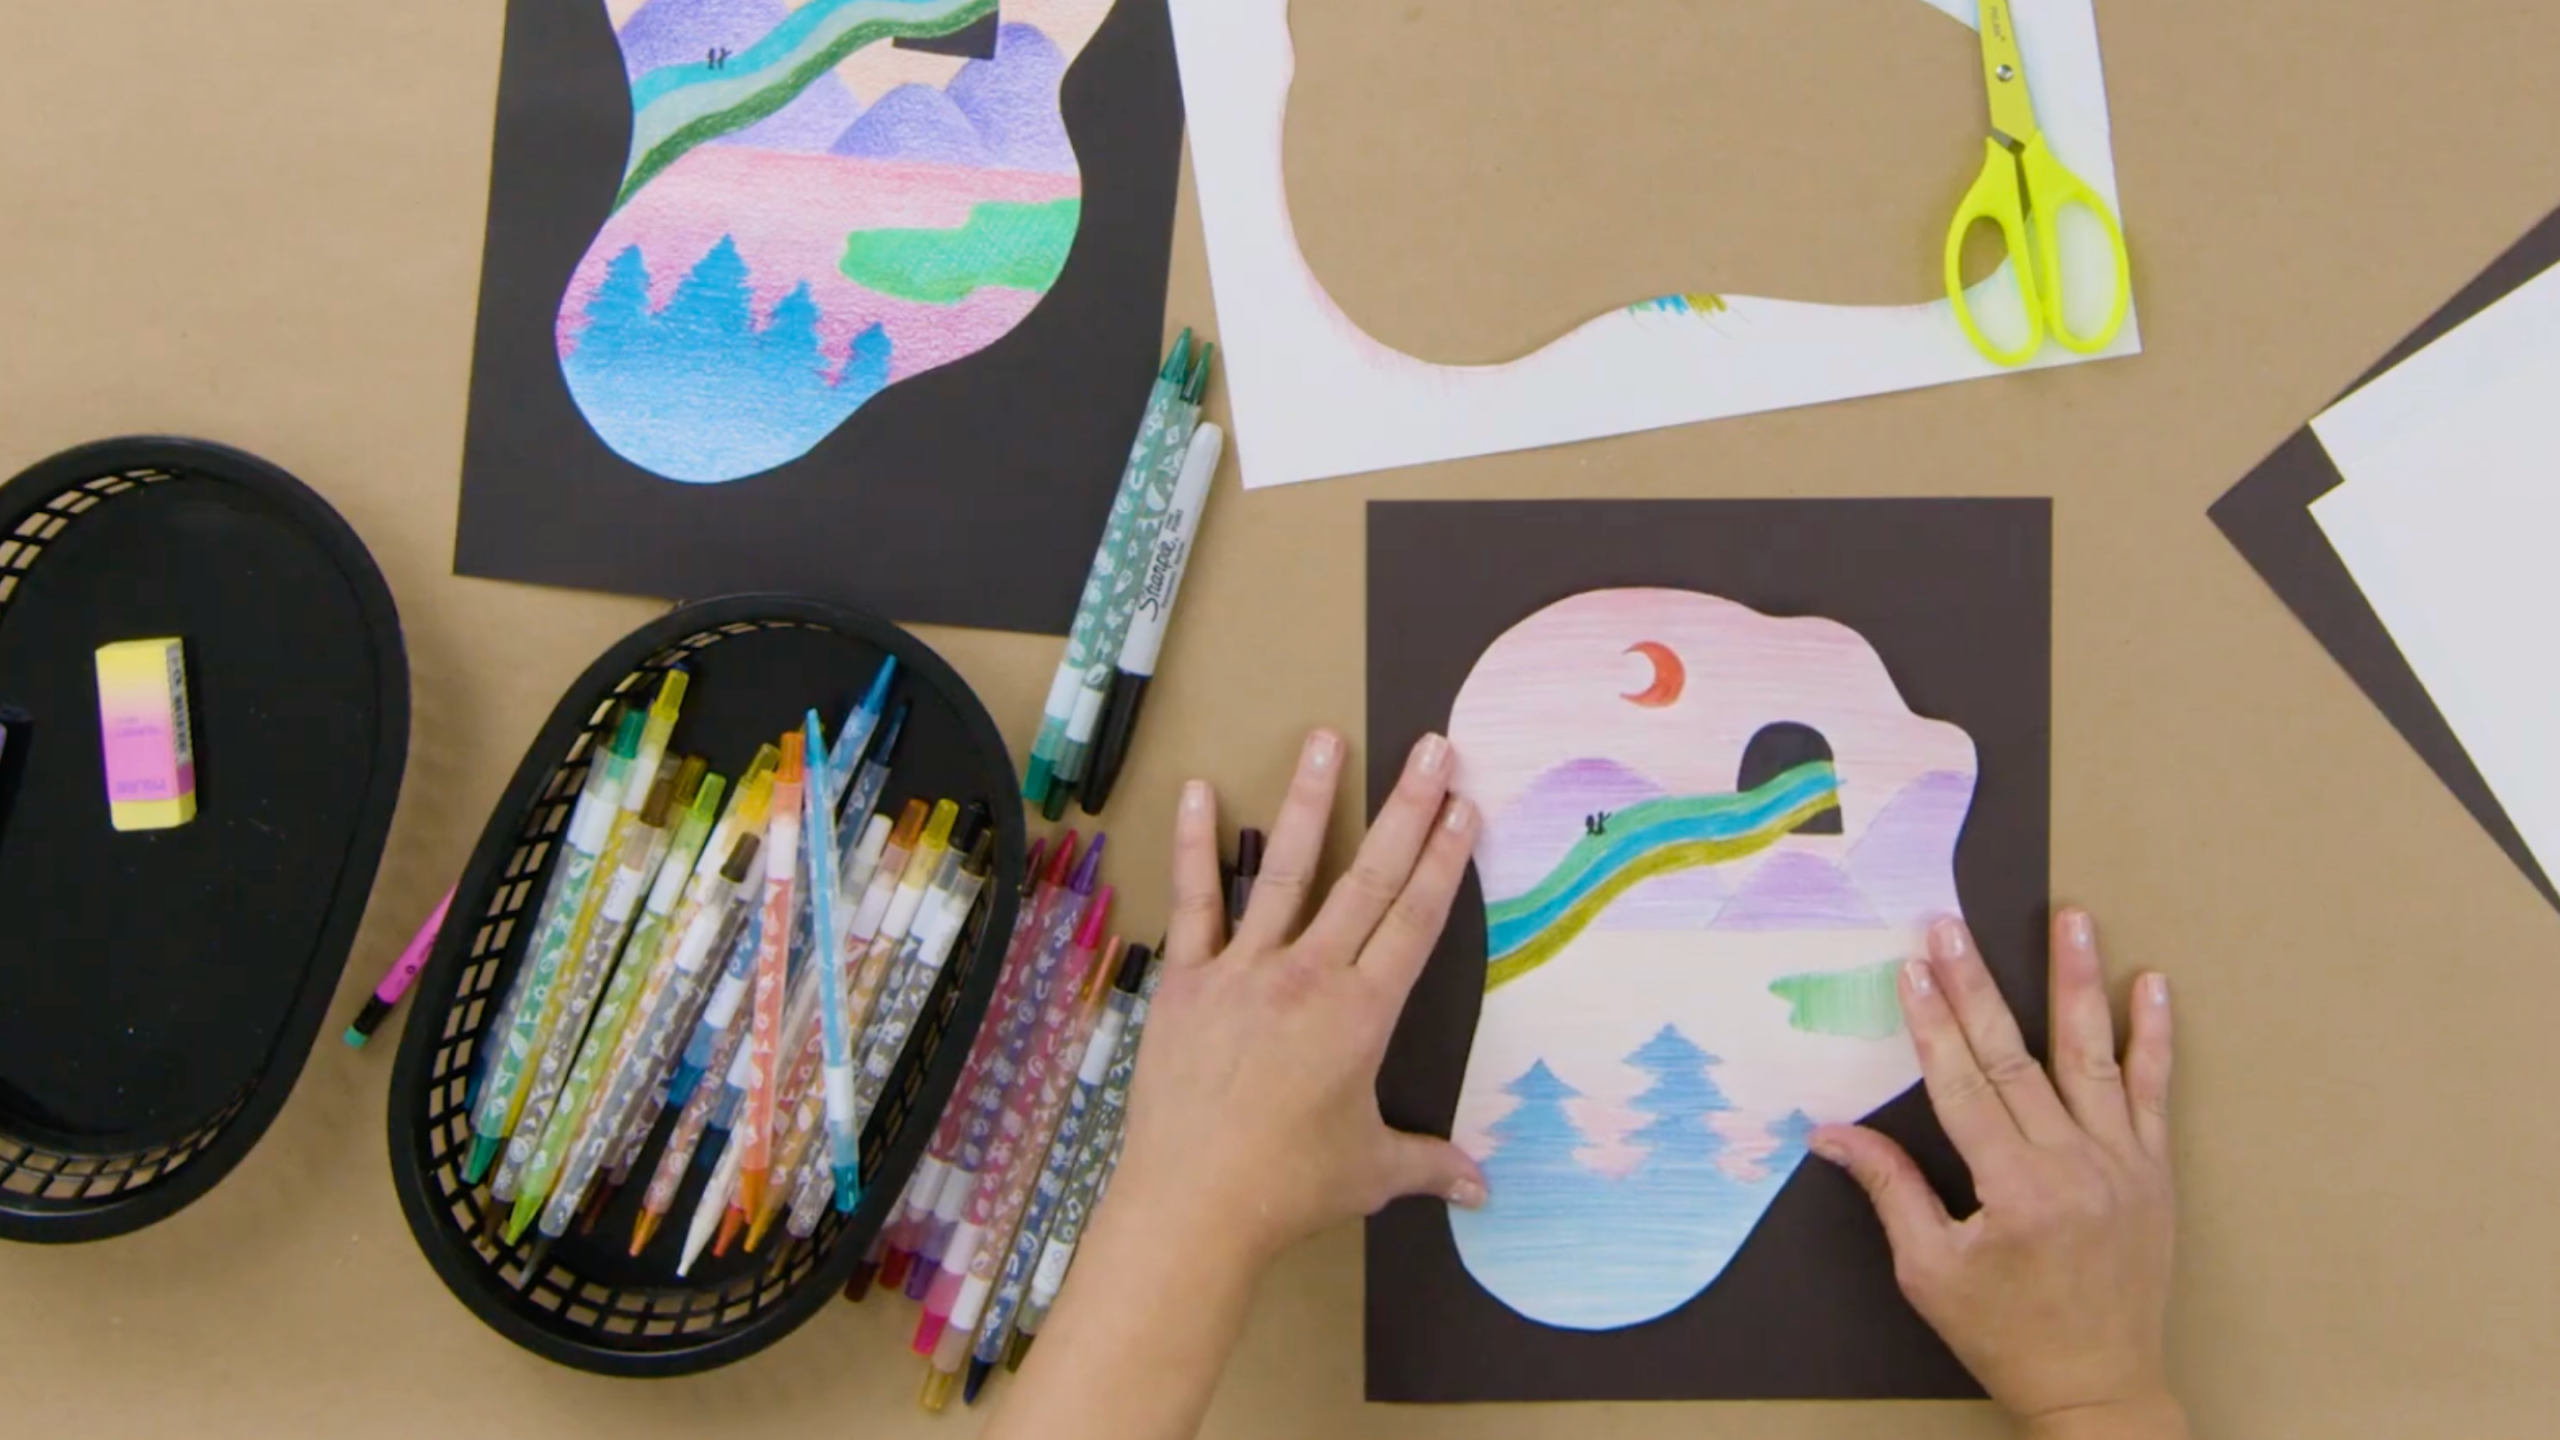
- Prepare Your Background: Take your construction paper. Before gluing, place your cut-out portal drawing on top of the paper. Move it around to decide where you want to glue it. This helps you plan your final layout.
- Glue It Down: Once you are happy with the placement, flip your portal drawing over. Use your glue stick to put glue all around the edges and in the middle. Flip it back over and carefully place it onto the black paper. Smooth it down with your hands and fingers.
Mounting your drawing on black paper makes it look like a finished piece of art. The black background makes all your colors pop and stand out even more. It also creates another cool effect: the black paper itself can feel like a portal, with your colorful world peeking through.
Conclusion: Reflecting on Your Journey
You’ve created an amazing piece of art today! You imagined a magical portal and brought it to life with drawing and coloring techniques. You thought about where your portal might lead and what changes you might experience. You also learned how to use gradients and contrast to make your art more exciting.
This project used your creativity and helped you explore your feelings about new experiences. Art is a powerful way to understand yourself and the world. Keep practicing these techniques and finding inspiration from other artists. You never know who you might inspire with your own unique artwork!
You May Also Like: